

Last July, my window AC started making this low, rattling hum around 2 AM. Not loud enough to wake the whole house, but definitely loud enough to keep me up. I ignored it for about a week — classic mistake — and by the time I actually looked into it, the coils were so clogged with dust that the unit was barely pushing cold air. The electricity bill that month? Let’s just say it hurt.
That whole experience turned me into someone who actually maintains their AC unit regularly. Not out of obsession, just out of self-preservation. I’ve been doing these eight tricks every single month since then, and honestly, the difference is night and day — quieter unit, better cooling, and my bills dropped noticeably.
Here’s exactly what I do, in the order I do it.
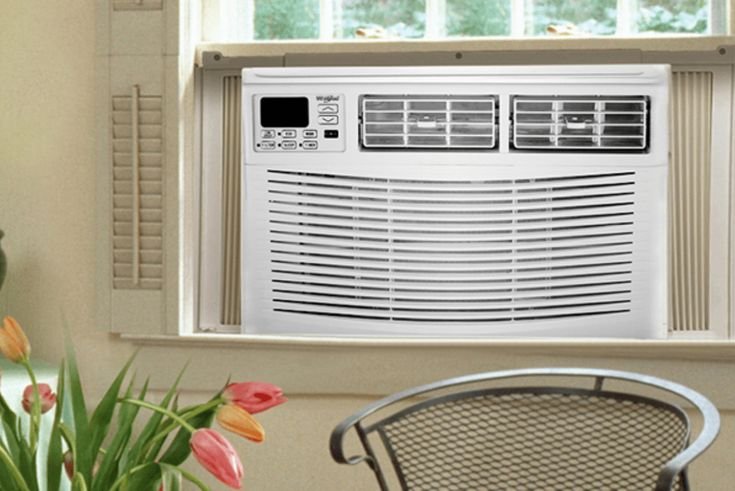
1. Clean or Replace the Air Filter First — Always First
This is the one most people either forget or do once a year and call it done. I used to be that person.
The filter is your AC’s first line of defense against dust, pet hair, and whatever else floats around in your home. When it’s clogged, the unit has to work harder to pull air through — which means more electricity consumed and less cool air coming out.
Every month, I pull the filter out, hold it up to a window, and check how much light passes through. If it’s looking like a grey felt blanket, it gets cleaned. I rinse it under lukewarm water, let it dry completely (this part is important — putting a damp filter back in causes mold), and slide it back in.
Pro tip: I keep a spare filter handy. If mine is heavily soiled and I’m in a rush, I swap it in immediately and wash the dirty one at my own pace.
A clean filter alone can improve cooling efficiency by a surprising amount. It’s boring advice, I know — but it works.
2. Wipe Down the Front Panel and Vents
After the filter, I take a slightly damp microfiber cloth and wipe down the entire front panel, including the vent slats. Dust settles into those gaps and over time it starts recirculating right back into your room.
I use a soft-bristled paintbrush — literally a cheap one from a hardware store — to get into the vent gaps. It’s way more effective than trying to shove a cloth in there.
This step takes maybe five minutes, but it genuinely makes a difference in how clean the air feels in the room. If you’ve ever noticed a musty smell when you first turn on the AC, a lot of the time that’s coming from dirty front panels and vents, not just the filter.
3. Check and Clear the Drain Hole
This one took me an embarrassingly long time to even know about.
Window AC units pull moisture from the air as they cool — that moisture has to go somewhere. Most units have a drain hole or drainage pan at the back that lets water drip outside. When that gets blocked with debris, algae, or dirt buildup, water starts backing up inside the unit.
I learned this the hard way when I noticed water dripping from the inside edge of my AC instead of outside. Not fun.
Now, every month I take a thin wire or a pipe cleaner and gently clear out the drain hole. I also tilt the unit very slightly toward the outside (most are already installed this way, but it shifts over time) to make sure gravity is doing its job.
If you’re dealing with consistent water leakage, this is almost always the culprit. You can find a detailed breakdown on 10 Easy Window AC Cleaning Maintenance Guide Fixes for Water Leakage that goes into more depth on this specific issue.
4. Inspect the Evaporator and Condenser Coils
Okay, this one sounds technical, but stick with me.
The evaporator coils (inside, front part) and condenser coils (outside, back part) are essentially the heart of your AC. They’re the metal fin-looking things that actually do the cooling work. When they’re coated in dust and grime, your unit loses efficiency fast.
I don’t deep-clean the coils every month, but I do inspect them every month. Takes about two minutes with a flashlight. I’m looking for:
- Visible dust buildup on the fins
- Bent fins (which restrict airflow)
- Any signs of ice forming on the coils
If I spot dust accumulation, I use a can of compressed air to blow it off — gentle bursts, not sustained blasts. For bent fins, there’s a cheap tool called a fin comb (costs about $8–10) that straightens them back out. I bought one after realizing that bent fins were quietly killing my airflow.
For a deeper coil cleaning every few months, I use a no-rinse coil cleaner spray. You just spray it on, let it foam up, and it drips away with the condensation. Works really well.
5. Listen for Weird Noises — Seriously, Just Listen
This might sound too simple, but I actually sit near my AC for a minute or two each month and just… listen. No distractions.
Different noises mean different things:
| Sound | Likely Cause | What I Do |
|---|---|---|
| Rattling | Loose screws or debris inside | Tighten screws, check for debris |
| Squealing | Fan belt issue or dry motor | Call a technician |
| Clicking on/off repeatedly | Electrical issue | Unplug and inspect |
| Bubbling/gurgling | Refrigerant issue | Call a technician |
| Hissing | Refrigerant leak | Turn off, call technician |
| Rumbling | Compressor issue | Call a technician |
The rattling noise I mentioned at the beginning? That was the first sign something was wrong. I ignored it. Don’t be like me.
Loose screws on the outer casing are the easiest fix — I just go around the unit with a screwdriver once a month and make sure nothing has vibrated loose. It takes less than five minutes.
6. Clean the Exterior (The Outside-Facing Part)
A lot of people forget that the back of a window AC is exposed to the outdoors 24/7. It collects leaves, dust, spider webs, bird droppings — the works. All of that gunk blocks the condenser from releasing heat properly.
Once a month (more often in summer), I lean out the window or go outside if accessible, and give the exterior coils a gentle rinse with a garden hose on a low-pressure setting. I let it dry before turning the unit back on.
What I don’t do is use a pressure washer. Learned that from a neighbor who bent half his condenser fins in one go. The fins are delicate — treat them accordingly.
If you can’t easily access the back of your unit, even using a soft brush attachment on a vacuum cleaner to clear visible debris from the outside makes a real difference. You can get more practical ideas from this Window AC Cleaning Maintenance Guide on proven tricks to fix airflow problems.
7. Check the Window Seal and Insulation Panels
This one is easy to overlook because it doesn’t involve the AC unit itself.
Window ACs come with foam or accordion-style side panels that fill the gap between the unit and your window frame. Over time, these panels warp, tear, or just stop sealing properly. When that happens, warm outdoor air seeps in around the sides, and all your cold air leaks out.
Every month I run my hand along the edges of the unit while it’s running. If I feel warm air coming in from the sides or top, the seal is compromised.
Fixes are simple:
- Replace torn foam panels (cheap, available at any hardware store)
- Add weatherstripping tape around gaps
- Re-secure any panels that have shifted
This is one of those things that has a huge impact on both cooling performance and electricity usage. A leaky seal means your AC never actually wins the battle against the heat — it just runs longer and costs you more.

8. Run a Monthly Performance Check
The last thing I do is a quick performance audit. It sounds fancier than it is.
I turn the AC to its highest cooling setting and lowest fan speed, then use a simple thermometer (I use a cheap one from the kitchen drawer) to measure the air coming out of the vents versus the room temperature. A healthy window AC should produce air that’s roughly 15–20°F cooler than the room temperature.
If the gap is smaller than that, something’s off — usually a dirty filter (already checked), blocked coils, or a refrigerant issue.
I also check these things during my performance audit:
- Does the unit cycle on and off properly? Constant cycling without reaching the set temperature is a red flag.
- Is it cooling evenly? If one side of the room stays warm, airflow might be blocked or the vents need adjustment.
- What does the exterior unit feel like? It should feel warm as it exhausts heat. If it’s cool, the compressor may not be working right.
Keeping a simple log helps too. I just jot down the date and any observations in a notes app. When something changes month to month, I catch it early instead of waking up at 2 AM to a rattling noise.
Common Mistakes I Made (So You Don’t Have To)
Since I’ve been doing this a while now, here are the mistakes I made early on that I’d save you from:
Putting a wet filter back in. Mold grows fast in a moist, enclosed space. Always let the filter dry fully — I usually leave it for a few hours in the sun.
Using too much water near electrical parts. When cleaning, I keep water well away from the electrical components at the sides and back.
Skipping the drain check in winter. Even if you’re not using the AC, debris can accumulate in the drain hole. I check it before the first use of the season too.
Ignoring small sounds. Every weird noise I ignored eventually turned into something that cost money. Now I investigate immediately.
Cleaning too aggressively. Those fins are fragile. A gentle touch with a soft brush goes a long way.
If you want to go even deeper into efficient habits, this guide on smart window AC maintenance tricks that prevent breakdowns has some really solid additional steps worth adding to your routine.
How Long Does All of This Take?
Here’s an honest breakdown of my monthly routine:
| Task | Time Required |
|---|---|
| Filter cleaning | 5–10 minutes (including drying time) |
| Front panel wipe-down | 5 minutes |
| Drain hole check | 2–3 minutes |
| Coil inspection | 2 minutes |
| Noise check | 2 minutes |
| Exterior cleaning | 10 minutes |
| Seal inspection | 3 minutes |
| Performance check | 5 minutes |
| Total | ~35–40 minutes |
One Sunday afternoon a month. That’s genuinely all it takes. And what you get in return — better cooling, lower electricity bills, and fewer panicked calls to an AC technician — is absolutely worth it.
Final Thoughts
I’m not an HVAC professional. I’m just someone who got tired of paying high electricity bills and dealing with a struggling AC every summer. These eight tricks came from a mix of trial and error, a few painful repair bills, and eventually, figuring out that consistent small habits beat big reactive fixes every time.
The units that last 10–15 years aren’t just the expensive ones — they’re the ones that got a little attention every month. Yours can too.
Also worth reading: 9 Powerful Window AC Cleaning Maintenance Guide Steps I Wish I Knew Earlier — a great companion piece with additional cleaning steps that pair well with this routine.