

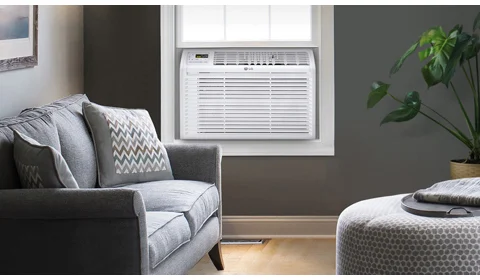
Last July, my window AC started making this weird rattling noise at 2 AM. Of course it did — because appliances never break down at a convenient time. My first instinct was to call a technician first thing in the morning. But then I thought, let me just take a look at it myself before spending money on a service call.
Turns out? The problem was a loose side panel. Literally took me 45 seconds to fix.
That experience completely changed how I approach window AC problems. I realized I’d been calling technicians for issues I could have handled myself — and probably wasting hundreds of dollars over the years doing it.
So if your window AC is acting up right now — not cooling properly, making strange sounds, leaking water, or just behaving weirdly — please don’t pick up the phone just yet. Go through these five steps first. You might save yourself a lot of time, money, and unnecessary hassle.
1. Check the Basics First — Power, Settings, and Mode
I know this sounds almost insultingly obvious, but hear me out. I once spent 20 minutes convinced my AC had stopped working, only to realize someone had switched it to “Fan Only” mode instead of “Cool.” Embarrassing? Yes. But it happens to more people than you’d think.
Before assuming anything is broken, run through this quick checklist:
- Is the AC actually set to “Cool” mode? Fan mode circulates air but doesn’t cool it. Make sure the mode is correct.
- Is the thermostat set lower than the current room temperature? If your room is 26°C and the AC is set to 27°C, it simply won’t turn on the compressor.
- Is the unit plugged in properly? Sometimes the plug loosens slightly in the socket, especially in older outlets.
- Did the circuit breaker trip? Window ACs draw a lot of power. Check your electrical panel — if the breaker for that room has tripped, reset it and see if the unit comes back on.
- Is the timer accidentally set? Many units have a timer function, and sometimes it gets activated without you realizing it.
This whole check takes less than two minutes. And honestly, a surprising percentage of “AC problems” are solved right here.
Pro tip: If your breaker keeps tripping every time you run the AC, that’s a sign the unit is on a circuit with too many other appliances. Try unplugging other devices from that room and running the AC alone.
2. Clean or Replace the Air Filter — This One Fix Solves More Than You’d Expect
If there’s one thing I wish someone had told me earlier, it’s that a dirty air filter is responsible for more AC problems than almost anything else. Weak airflow, warm air, ice buildup on the coils, higher electricity bills — a lot of these trace back to a clogged filter.
Most window AC filters should be cleaned every 2–4 weeks during peak summer use. But most people (myself included, for years) forget about it entirely.
Here’s how to do it properly:
Step 1: Turn off and unplug the AC.
Step 2: Locate the front panel. On most window units, it either snaps open or slides up. Behind it, you’ll find a mesh filter — usually gray or blue.
Step 3: Pull out the filter carefully. If it’s gray with dust (or worse, almost black), that’s your culprit.
Step 4: Take it to the sink and rinse it under warm water. For stubborn grime, use a tiny drop of dish soap and gently scrub with a soft brush. Don’t use hot water or harsh chemicals.
Step 5: Let it air dry completely — this is important. Putting a wet filter back in causes mold and can damage the unit. Give it at least an hour.
Step 6: Slide it back in, close the panel, plug in the unit, and test it.
I’ve had units that went from barely cooling a room to feeling like a proper blast of cold air just from cleaning a heavily clogged filter. It’s genuinely that impactful.
| Filter Condition | Likely AC Symptoms |
|---|---|
| Lightly dusty | Slight reduction in airflow |
| Heavily clogged | Weak cooling, higher electricity use |
| Completely blocked | Ice formation on coils, unit may shut off |
| Moldy or damaged | Bad smell, poor air quality |
If your filter looks physically damaged or has developed a moldy smell that doesn’t go away after cleaning, it’s time to replace it. Replacement filters for most common window AC brands are cheap and easy to find online.
For more detailed guidance on this, check out these 7 Easy Window AC Cleaning Hacks for Fresh Air — really helpful if you want to go deeper into the cleaning process.
3. Inspect the Coils and Drainage — Two Often-Ignored Culprits
Once you’ve dealt with the filter, the next thing to check is the evaporator coils (the ones inside, behind the filter) and the drainage system. These two things cause a huge number of complaints — ice formation, water leaking into the room, musty smells, and weak cooling.
The Coils:
After removing the filter, take a flashlight and look at the coils behind it. They should look like a series of thin metal fins. If they’re packed with dust or have a layer of grime on them, airflow is being restricted even if your filter was clean.
You can gently clean them with a soft brush or a can of compressed air. Specialty coil cleaning sprays (available at hardware stores) work well too — just follow the instructions on the can.
One thing I learned the hard way: never bend the fins. They’re very delicate, and bent fins restrict airflow just like dirt does. There’s actually a tool called a “fin comb” you can use to straighten them if they’re already bent, but it’s better to just be careful in the first place.
The Drainage:
Window ACs remove humidity from the air, and that water has to go somewhere. There’s a drain pan at the bottom of the unit and usually a small drain hole or tube at the back.
If you’re seeing water dripping inside the room (rather than outside), the drain is likely clogged. Here’s a quick fix:
- Use a thin wire or pipe cleaner to gently clear the drain hole at the back of the unit.
- Mix a small amount of bleach with water (1 tablespoon bleach per cup of water) and pour it into the drain pan to kill any algae or mold buildup.
- Make sure the unit is tilted very slightly toward the outside — about half an inch — so water naturally drains outward.
That slight tilt is something a lot of people miss during installation, and it causes indoor leaking for the entire summer until someone finally figures it out.
4. Look for Airflow Blockages — Inside and Outside the Unit
Your AC is essentially trying to move air in two directions at once: pulling warm indoor air across the cold coils to cool your room, and pushing hot air out through the back to the outside. If either of these airflow paths is blocked, the whole system suffers.
Inside the room:
- Is anything blocking the front of the AC? Curtains, furniture, or even a pile of clothes draped over a chair nearby can significantly reduce airflow.
- Are the vents open and pointed in the right direction? Sometimes the louvers get accidentally closed or pointed at a wall.
- Is the room too large for the unit? A 5,000 BTU window AC in a 400 sq ft room is always going to struggle. That’s not a malfunction — it’s just undersized for the space.
Outside the unit:
This one surprises people. The back of your window AC (the part facing outside) also needs clear airflow to reject heat properly. If you look outside and see leaves, debris, or even bird nests packed around the condenser coils, that’s a serious problem.
Turn off the unit, go outside if you can safely access it, and gently clear any blockage from around the back and sides of the unit. A garden hose on a gentle setting can help rinse debris off the condenser fins — just make sure the unit is off and unplugged before doing this.
Also check that the window seal around the unit is intact. Those foam side panels and top seals are there for a reason — if warm outside air is leaking in around the edges, your AC has to work twice as hard to compensate. Replacing worn foam seals costs almost nothing and makes a noticeable difference.
If you’re also dealing with energy bills going up alongside these performance issues, this article on 10 Smart Window AC Maintenance Tricks You Should Know covers some great overlapping tips.
5. Listen, Smell, and Observe — Let Your Senses Help Diagnose the Problem
This last step is a bit different from the others. Instead of doing something specific, I want you to just pay attention. Your senses are actually really good diagnostic tools, and knowing what different symptoms mean can tell you a lot about whether this is a DIY fix or a genuine call-a-technician situation.
Strange noises:
| Sound | What It Usually Means |
|---|---|
| Rattling or vibrating | Loose panel, screw, or foreign object inside the unit |
| Clicking when starting | Normal — compressor cycling on |
| Constant clicking that won’t stop | Control board or relay issue — might need a technician |
| Grinding or squealing | Fan motor bearings wearing out — needs attention soon |
| Bubbling or gurgling | Refrigerant issue — call a technician |
Rattling and vibrating are almost always DIY-fixable. Grinding, squealing, and bubbling sounds usually aren’t.
Strange smells:
- Musty/moldy smell: Mold or mildew in the filter, coils, or drain pan. Clean everything thoroughly.
- Chemical or sweet smell: This could indicate a refrigerant leak. Don’t ignore this — refrigerant is harmful and this needs a professional.
- Burning smell: Turn the unit off immediately. This usually means an electrical issue — a failing motor or wiring problem. Don’t run the unit until a technician checks it.
- Dusty smell at the start of the season: Completely normal. It’ll go away after running for a few minutes.
Visual clues:
- Ice forming on the coils or refrigerant lines? Turn the unit off and let it thaw for a few hours. This usually means either a clogged filter (which you’ve now cleaned) or low refrigerant. If it keeps happening after cleaning, refrigerant is likely the issue.
- Water pooling inside? Drainage blockage — go back to Step 3.
- The display panel flickering or showing error codes? Write down the code and look it up in your manual or on the manufacturer’s website. Most brands have specific codes that tell you exactly what’s wrong.
A quick note on error codes: I used to ignore them completely because I didn’t understand them. Now I always check. For a lot of brands like LG, Frigidaire, or GE, the error code system is surprisingly specific and helpful. A quick Google search of “your brand + error code + number” will usually give you an immediate answer.
Common Mistakes People Make Before Calling a Technician
While we’re here, let me quickly share a few things I’ve seen people do (including myself) that either made the problem worse or just wasted money:
Mistake #1: Running the AC on a tripped circuit breaker repeatedly. If it trips once, check why. If it trips again immediately, stop and investigate. Repeatedly resetting it can cause electrical damage.
Mistake #2: Using too much water when cleaning. AC units have electrical components. Don’t spray water directly into the unit or use a pressure washer on it.
Mistake #3: Ignoring the smell. People get used to a musty smell and just live with it. That mold is blowing directly into your room. Deal with it.
Mistake #4: Assuming ice = more cooling. Ice forming on your AC is never a good sign. It means the system is not working correctly, not that it’s working extra hard.
Mistake #5: Skipping the manual. I know. Nobody reads manuals. But most modern window AC manuals have a troubleshooting section that’s actually useful. Skim it at least once — it’s often specific to your exact unit.
For a deeper look at this, these 9 Essential Window AC Maintenance Guide Tips cover what happens when you skip regular upkeep and what it costs you later.
So, When Should You Actually Call a Technician?
After going through all five steps, if your AC still isn’t working right, here are the situations where you genuinely do need professional help:
- Refrigerant-related issues (bubbling sounds, chemical smells, persistent ice buildup after cleaning)
- Burning smell or any sign of electrical problems
- Compressor not turning on at all despite everything else checking out
- The unit is more than 10–12 years old and performance has steadily declined
- Physical damage to internal components
Everything else? Give the five steps above a real, honest try first. You might be surprised how often the fix is sitting right in front of you.
Window ACs are actually pretty straightforward machines once you get familiar with them. They’re not mysterious or complicated. Most problems are caused by neglect — dirty filters, blocked drainage, poor airflow — and those are 100% within your ability to fix on a Sunday afternoon.
Also worth reading: 7 Quick Window AC Troubleshooting Tips That Actually Work — a great complement to this guide if you want even more specific fixes for common problems.