

9 ultimate window ac installation & setup guide for beginners
There’s something oddly satisfying about installing a window air conditioner yourself. It’s not just about saving money or avoiding the wait for a technician. It’s about understanding your own space—how air flows, how heat builds up, and how a simple machine can transform a stifling room into a cool retreat.
I didn’t always see it that way. The first time I tried installing a window AC, I made almost every mistake you can imagine. I underestimated the weight, ignored the tilt, skipped sealing the gaps properly, and paid for it later with poor cooling and a noisy unit. Over time, though, I learned that installing a window AC isn’t complicated—it just demands attention to a few key details.
This guide is built from those lessons. Not theory, not textbook instructions, but practical steps and real-world insights that actually make a difference.
- choosing the right window ac before you even start
Before you even think about lifting a unit into a window, pause. The installation process starts long before that—with choosing the right AC.
A unit that’s too small will run endlessly without cooling properly. One that’s too big will cool too quickly without removing humidity, leaving the room feeling damp and uncomfortable.
Start by measuring your room. For a small room (around 100–150 square feet), a unit around 5,000–6,000 BTU works well. Medium rooms may need 8,000–10,000 BTU, and larger spaces can go up to 12,000 BTU or more.
But room size isn’t the only factor. Think about sunlight. A room that gets direct afternoon sun heats up faster and needs a bit more power. Also consider how many people typically use the room, and whether there are heat-generating appliances inside.
When I upgraded my AC, I made the mistake of going bigger “just to be safe.” It turned out to be inefficient and uncomfortable. The lesson: match the AC to your space, not your assumptions.
- checking your window type and structure
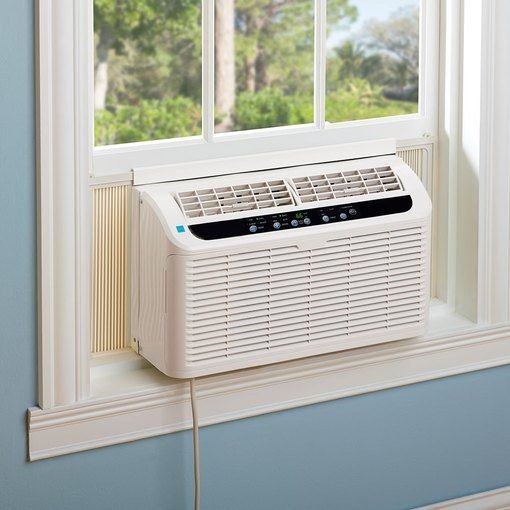
Not every window is suitable for a window AC, even if it looks like it might fit. Most window ACs are designed for double-hung windows—the kind that slide up and down.
If you have sliding windows that open sideways, you may need a special mounting kit or a different type of AC altogether.
The next thing to consider is the strength of the window frame. Window AC units are heavy. Even smaller ones can weigh over 20 kg, while larger models can exceed 40 kg.
Check for:
– Loose frames
– Rotting wood
– Weak support beneath the window
One time, I installed a unit in a slightly damaged frame thinking it would “hold for now.” It didn’t collapse, but it shifted just enough to cause vibration and noise every time the compressor kicked in.
If your window doesn’t feel solid, fix it first. Installation on a weak base is asking for trouble.
- gathering the tools you’ll actually need
Many beginners think installing a window AC requires a full toolbox. In reality, you need only a few essentials—but you do need the right ones.
Here’s what typically comes in handy:
– Screwdriver (flathead and Phillips)
– Measuring tape
– Level (this one matters more than you think)
– Drill (optional but useful)
– Foam insulation or weather stripping
– Support brackets (for larger units)
Don’t skip the level. A slight tilt is necessary for proper drainage, but too much or too little can lead to water leakage inside your room.
I once eyeballed the angle instead of measuring it. It looked fine—until water started dripping inside during humid weather. Lesson learned.
- preparing the window space properly
Preparation is where most installations go right or wrong. Rushing this step leads to gaps, instability, and poor performance.
Start by cleaning the window area thoroughly. Remove dust, debris, and anything that might prevent a tight seal.
Next, open the window fully and measure the width. Compare it with your AC unit. Most window ACs come with extendable side panels, but they only cover a certain range.
Check the sill—the flat bottom part of the window. It should be level and sturdy. If it’s uneven, consider adding a support board to create a flat surface.
Take your time here. A well-prepared window makes the rest of the installation almost effortless.
- installing support brackets for safety
This is the step many beginners skip, especially with smaller units. That’s a mistake.
Support brackets are not just for heavy-duty installations. They reduce strain on your window frame and keep the AC stable over time.
Mount the bracket according to its instructions, usually on the exterior wall beneath the window. Make sure it’s level and securely fastened.
If drilling into the wall isn’t an option, there are no-drill brackets available that rely on pressure and positioning.
When I installed my second AC, I used a bracket for the first time. The difference was immediate—less vibration, better alignment, and a more secure feel overall.
- placing the ac unit without struggling
This is the part that intimidates most beginners: lifting and positioning the unit.
First rule—don’t do it alone if the unit is heavy. It’s not worth risking injury or dropping the AC.
Lift the unit carefully and place it on the window sill. Slide it into position so that the bottom rests securely and the top aligns with the window frame.
Close the window sash down onto the AC unit. This helps hold it in place while you secure it.
Make sure the unit is centered. Uneven placement can affect performance and stability.
Take a moment here to check alignment before moving on. Adjusting later is much harder.
- sealing the gaps like a pro
Even a perfectly installed AC won’t perform well if there are gaps around it. Hot air will sneak in, cool air will escape, and your electricity bill will rise.
Extend the side panels to fill the horizontal gaps. Then use foam insulation or weather stripping to seal any remaining spaces.
Pay special attention to the top gap between the window sash and the frame. This is often overlooked but can be a major source of air leakage.
If needed, use a piece of rigid foam or even a custom-cut board to block larger openings.
The goal is simple: make the installation as airtight as possible without restricting airflow from the AC itself.
- ensuring proper tilt for drainage
This is one of the most misunderstood parts of window AC installation.
Your AC needs a slight tilt downward toward the outside. This allows condensation to drain properly.
If the unit is perfectly level or tilted inward, water can accumulate and eventually leak into your room.
Use a level to check the angle. Most manufacturers recommend a slight tilt—just enough for water to flow out naturally.
You don’t need a dramatic angle. In fact, too much tilt can cause noise and reduce efficiency.
This small detail can make a big difference in how your AC performs over time.
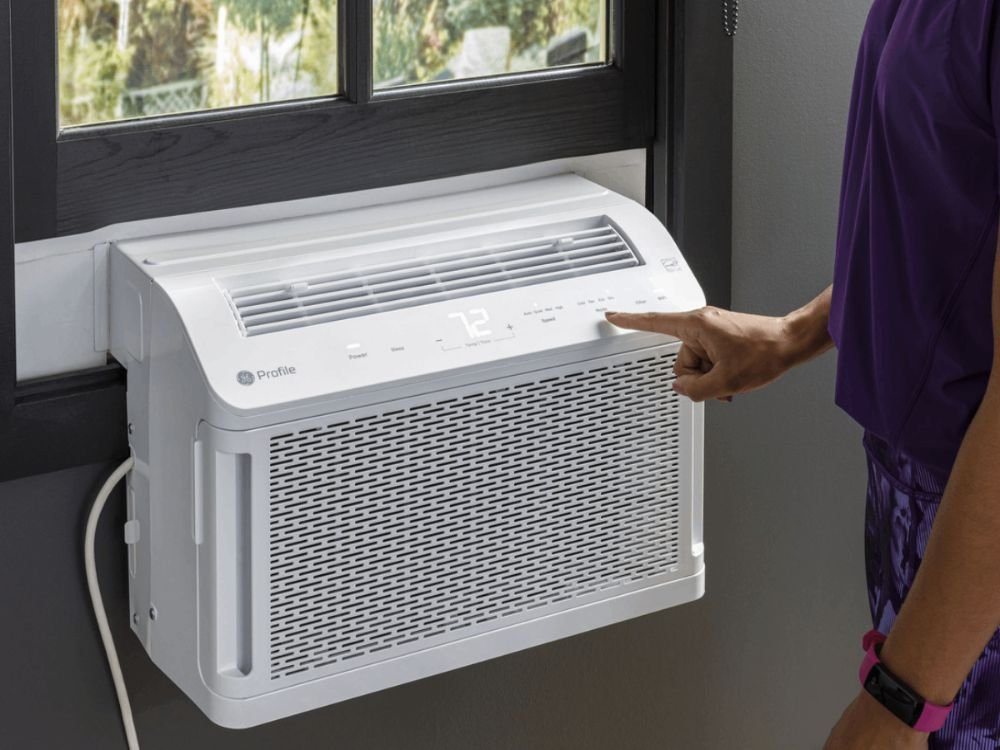
- testing, adjusting, and learning from the first run
Once everything is in place, it’s time to turn on the AC. But don’t just switch it on and walk away.
Stay with it for a few minutes. Listen to the sound. Feel the airflow. Check for vibrations.
Look for:
– Unusual noises
– Air leaks
– Water dripping inside
– Weak airflow
If something feels off, don’t ignore it. Small issues are easier to fix immediately than later.
During my first proper installation, I noticed a slight rattling sound. It turned out to be a loose panel that needed tightening. Fixing it early saved me from days of annoyance.
Give the AC some time to cool the room. Notice how quickly it works and how evenly the air spreads.
Installation doesn’t end when the unit turns on—it ends when it runs smoothly.
practical tips that make everything easier
There are a few small things that don’t always make it into official guides but can make your experience much better.
Install during cooler hours of the day. Handling a heavy AC in extreme heat is exhausting.
Keep all screws and parts in one place. Losing even one small piece can delay the process.
Read the manual—but don’t rely on it alone. Real-world adjustments are often necessary.
And most importantly, don’t rush. A careful installation can last for years without issues.
common mistakes beginners should avoid
Even with the best intentions, beginners often repeat the same mistakes.
Skipping support brackets
Ignoring the tilt
Leaving gaps unsealed
Choosing the wrong size unit
Rushing the installation
Each of these can affect performance, efficiency, and comfort.
I’ve made most of these mistakes myself. The good news is that once you understand them, they’re easy to avoid.
why proper installation matters more than you think
A window AC is only as good as its installation.
A poorly installed unit will struggle to cool the room, consume more electricity, and wear out faster.
A properly installed unit, on the other hand, runs quietly, cools efficiently, and lasts longer.
It’s not about perfection—it’s about getting the basics right.
faqs
- how long does it take to install a window ac for beginners?
For most beginners, it takes about 1–2 hours. The first time may take longer as you figure things out, but once you understand the process, it becomes much quicker. - do i really need a support bracket for a small ac unit?
While not always mandatory, it’s highly recommended. Even small units benefit from added stability and reduced strain on the window frame. - what happens if my window ac is not tilted properly?
Improper tilt can cause water to leak inside your room or collect inside the unit, leading to potential damage and reduced efficiency. - can i install a window ac without drilling?
Yes, there are no-drill brackets and installation kits available. However, they must be used correctly to ensure stability and safety. - how do i know if my ac is the right size for my room?
If the AC cools the room evenly without running constantly or shutting off too quickly, it’s likely the right size. Poor performance often indicates a sizing issue. - is it safe to install a window ac alone?
It depends on the weight of the unit. Smaller units can be installed alone, but for heavier ones, having someone assist you is much safer.
In the end, installing a window AC isn’t about technical skill—it’s about patience, awareness, and getting the small details right. Once you’ve done it properly, you’ll not only enjoy a cooler room but also the satisfaction of knowing you did it yourself.