

Meta Description: Window AC cleaning & maintenance guide habits can slash your energy bills and extend your unit’s lifespan. Discover 7 Essential Habits every homeowner needs to know.
Energy Efficiency — 7 Powerful Habits To Clean & Maintain Your Window AC
Window AC Cleaning & Maintenance guide habits to reduce your energy bills & enhance the lifespan of your unit. Learn 7 Essential Habits that Every Homeowner should Know.
Summer heat hits hard. And when your window AC can’t keep up, the pain is felt immediately on your energy bill.
The reality is that most window AC units do not fail suddenly. The efficiency decreases slowly over time due to one fact — neglect. Dust builds up. Filters clog. Coils get dirty. And before you know it, your unit’s working twice as hard to provide half the cooling.
The good news? You don’t have to be a technician to make this right. A good window AC cleaning & maintenance guide — based on seven smart habits — can keep your unit humming, lower your electricity bill, and help add years to the life of any machine.
Let’s parse it all out, step by step.
The Importance of Window AC Maintenance
Before getting into the habits, a quick reality check.
A dirty or poorly maintained window AC can consume as much as 15 percent more energy than a clean, well-maintained one. That may not sound like much, but over the course of a full summer — 8 hours a day — that adds up to real money.
Here’s a simple comparison to put things in perspective:
| Condition | Estimated Efficiency Loss | Monthly Energy Cost Increase |
|---|---|---|
| Clogged air filter | Up to 10–15% | $10–$25 |
| Dirty evaporator coils | Up to 30% | $25–$50 |
| Blocked condenser fins | Up to 20% | $15–$35 |
| Low refrigerant (leak) | Up to 40% | $40–$80+ |
| Bad window seal | 5–10% | $8–$20 |
Maintaining a clean unit goes beyond comfort. It’s about not tossing cash out the window — quite literally.
Habit 1: Change or Clean Your Air Filter Every 2–4 Weeks
This is the most important habit in any window AC cleaning & maintenance guide.
The air filter is the first line of defense for your unit. It traps dust, pet dander, pollen, and other particles carried by air before they enter the system. But once the filter gets clogged, air can’t move through it properly.
What happens next? The unit strains harder. It pulls more electricity. It cools less effectively. And your indoor air quality takes a nosedive.
How to Clean Your Window AC Filter
Cleaning a window AC filter takes less than ten minutes. Here’s how:
- Turn off and unplug your AC unit first — always.
- Remove the front panel. Most units have tabs you press or clips to release.
- Slide out the filter. Typically, this is a flat mesh screen.
- Tap off loose dust into a trash can.
- Rinse under warm water. If it’s very dirty, use a soft brush.
- Add a drop of dish soap for a deeper clean, then rinse thoroughly.
- Allow it to dry completely before reinserting it. A wet filter can cause mold.
- Reinstall and plug back in.
Pro Tip: If your filter looks gray, matted, or has visible holes — replace it, don’t just clean it. Replacement filters are generally well under $15.
How Often Should You Be Cleaning It?
| Usage Level | Recommended Cleaning Frequency |
|---|---|
| Light use (a few hours/day) | Every 4 weeks |
| Moderate use (6–8 hours/day) | Every 2–3 weeks |
| Heavy use (all day) | Every 1–2 weeks |
| Homes with pets or allergies | Weekly |
Habit 2: Maintain Clean Evaporator and Condenser Coils
Most people will just clean their filter and leave it at that. But the coils inside your window AC are equally important — and much more neglected.
Your unit has two sets of coils:
- Evaporator coils (inside, facing your room) — absorb heat from indoor air
- Condenser coils (outside, facing outdoors) — disperse that heat outside
When these coils have a layer of dirt or grime on them, they cannot transfer heat properly. The outcome is diminished cooling power and increased energy consumption.
A Step-By-Step Guide to Clean the Coils
You will need a coil cleaner spray (available at hardware stores or online), a soft brush, and a garden hose or spray bottle.
For evaporator coils (indoor side):
- Unplug the unit.
- Detach the filter and front panel.
- Apply coil cleaner directly to the coils.
- Allow it to foam and sit for 5–10 minutes.
- Gently wipe with a soft cloth or rinse lightly with water.
- Allow to dry completely.
For condenser coils (outdoor side):
- Take the unit outside if possible, or work near an open window.
- Use a soft brush to remove loose debris.
- Spray coil cleaner and let it sit.
- Rinse gently with a hose on low pressure — never high pressure, which can bend the fins.
Caution: Never spray directly on the electrical components. Stick to the coil surfaces only.
Plan to clean coils at least once per cooling season — more often if you run the unit heavily.
Habit 3: Use a Fin Comb To Straighten Condenser Fins
This one is a hidden gem in any window AC cleaning & maintenance guide.
The thin metal slats around the coils on the back of your unit are known as condenser fins. They are designed to maximize air circulation over the coils. But they’re also incredibly fragile.
It only takes a single bump during installation, or pressure from a garden hose, to bend several fins at once. Bent fins impede the flow of air — meaning less heat escapes outside, and your unit must work harder to make up for it.
How to Fix Bent Fins
A fin comb is a basic, low-cost tool (generally under $10) that fits between the fins and straightens them back to their original position.
Here’s how to use one:
- Unplug the unit.
- Pick the right comb setting that matches your fin spacing.
- Gently glide the comb along the fins in a straight up-and-down motion.
- Go slow — forcing the comb can snap fins off completely.
Inspect your fins at the beginning of every season. Even minor improvements in fin alignment can noticeably improve airflow and efficiency.
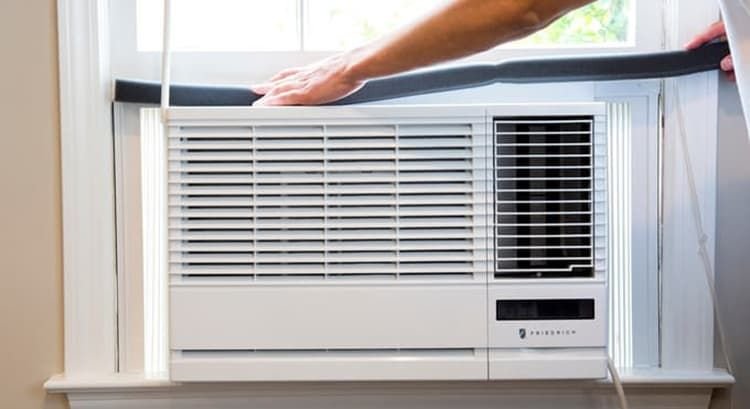
Habit 4: Inspect and Repair Your Window Seal
A surprising amount of cool air seeps out through the gaps around your window AC unit. This is a widely missed source of wasted energy.
If warm outside air is leaking in around the edges of the unit, your AC is essentially fighting a war it cannot win. It continues to cool the room, but outside heat keeps infiltrating.
How To Check Your Window Seal
- Run your hand slowly along the edges of the unit on the inside.
- Feel for any airflow or warm drafts.
- Look for any gaps between the AC frame and the window frame.
- Examine the foam side panels — they compress over time and might not seal correctly anymore.
How to Fix It
| Problem | Quick Fix |
|---|---|
| Gaps around the edges | Replace or add foam weatherstripping |
| Old/compressed foam accordion panels | Buy replacement foam accordion panels |
| Top gap of the window | Use a window insulation seal strip |
| General air leaks | Apply removable caulk for the season |
Foam weatherstripping is cheap and simple to apply. A properly sealed unit can cut energy waste by 5–10% all on its own.
Habit 5: Keep the Drainage System Clear
Here’s something most people never think about: your window AC makes water.
Moisture condenses when warm, humid indoor air passes over the cold evaporator coils — much like a cold beverage on a hot day. That water needs a place to go. Most window units drain it out the back, though some have a drain pan that catches it first.
If the drain becomes clogged, water backs up inside the unit. This can cause:
- Mold and mildew growth
- Musty smells from your AC
- Water damage to your window sill or wall
- Reduced cooling efficiency
How to Clean and Maintain the Drain
- Unplug the unit before doing anything.
- Tilt the unit slightly backward (most window ACs are designed to do this) so water drains out naturally.
- Locate the drain hole or pan — typically at the bottom back of the unit.
- Use a thin wire or pipe cleaner to poke through and clear any clogs.
- Pour a small amount of diluted bleach (1 part bleach to 10 parts water) into the drain pan to kill any mold or algae buildup.
- Look for standing water in the pan and wipe it dry.
Perform this check at the start of the cooling season and once mid-season if you run your AC heavily.
Habit 6: Clean the Exterior Cabinet and Intake Vents
The exterior of your unit matters more than you think.
Dust, cobwebs, leaves, and debris can collect on the outside of the cabinet and around the intake vents. That limits the airflow your unit requires to draw in outdoor air for cooling.
A blocked vent makes the fan motor work harder. That translates to more electricity, more wear and tear, and more heat produced inside the unit itself.
Simple Exterior Cleaning Routine
This step is fast — about 5 minutes is all you need:
- Unplug the unit.
- Wipe down the outer cabinet with a damp cloth. For tough grime, use a mild soapy solution.
- Use a vacuum with a brush attachment to clean out the intake vents on the back and sides.
- Remove leaves, dirt, or debris from around the unit’s exterior.
- Make sure nothing is blocking the airflow from outside — such as a bush, patio furniture, or curtains draped over the indoor vents.
Indoor Vent Placement Matters Too
Do not place furniture, curtains, or drapes in front of the unit’s front vents. Blocked indoor airflow is one of the quickest ways to reduce cooling effectiveness.
| What to Avoid | Why It Hurts Efficiency |
|---|---|
| Curtains draped over the front vent | Stops cool air from circulating |
| Furniture placed directly in front | Redirects cool air downward |
| Blinds closed against the unit | Traps heat near the AC |
| Clutter around the back exterior | Blocks condenser airflow |
Habit 7: Schedule a Full Deep Clean and Inspection Before Each Season
All the habits above are ongoing. But once a year — preferably just before summer — you should do a thorough, top-to-bottom deep clean and inspection of your entire window AC unit.
Think of it like an annual checkup. It’s far cheaper to catch a small problem in April than to deal with a broken unit in the middle of a July heatwave.
Your Pre-Season Deep Clean Checklist
Step 1: Remove the unit (if safe to do so) Taking the AC out of the window makes deep cleaning much easier. Place it on a level surface in your garage or outdoors.
Step 2: Remove the outer casing Most window AC casings are held in place by a few screws. Removing it exposes the full interior for cleaning.
Step 3: Clean everything
- Filter → wash and dry
- Evaporator coils → spray with coil cleaner, rinse, and dry
- Condenser coils → brush, spray, rinse
- Drain pan → bleach solution, wipe clean
- Fins → straighten with fin comb if required
- Fan blades → wipe down with a damp cloth
- Exterior → full wipe down
Step 4: Inspect critical components
| Component | What to Look For |
|---|---|
| Electrical cord | Fraying, cracks, or scorch marks |
| Fan blades | Cracks or wobbling |
| Coils | Visible ice buildup or oil residue (may indicate a refrigerant leak) |
| Fins | Bent or damaged areas |
| Drain pan | Cracks or rust |
| Thermostat | Accurate reading vs. room thermometer |
Step 5: Reassemble and test Reassemble all the components, reinstall the unit, and let it run for 15–20 minutes. Make sure it’s cooling properly, not making unusual noises, and draining correctly.
When to Call a Pro: If you see ice on the coils, smell something burning, hear a refrigerant hiss, or the unit isn’t cooling even after a full clean — call an HVAC technician. Some issues go beyond DIY. According to the U.S. Department of Energy, routine maintenance is key to keeping your AC running at peak efficiency — and knowing when to hand it off to a professional is just as important.
Quick Reference: Window AC Maintenance Schedule
Here’s a straightforward schedule you can follow all year long:
| Task | Frequency |
|---|---|
| Clean/check air filter | Every 2–4 weeks during use |
| Wipe exterior vents and cabinet | Monthly during use |
| Clear drain hole and pan | Once mid-season |
| Clean evaporator and condenser coils | Once per season |
| Straighten condenser fins | Once per season |
| Check and improve window seal | Once per season |
| Full deep clean and inspection | Once per year (pre-season) |
Print this out and stick it on your refrigerator. Consistency is what makes the difference.
Energy Savings Snapshot: Before vs. After Maintenance
Here’s a realistic look at what proper maintenance can do for your energy consumption:
| Maintenance Action | Potential Energy Savings |
|---|---|
| Cleaning a clogged filter | 5–15% reduction |
| Cleaning dirty coils | 10–30% reduction |
| Fixing poor window seal | 5–10% reduction |
| Straightening bent fins | 3–8% reduction |
| Clearing drain blockages | 2–5% reduction |
| Full seasonal deep clean (all tasks) | Up to 40% total reduction |
These figures are general industry estimates and will vary depending on your climate, unit age, and usage. But the trend is clear — maintenance pays for itself quickly.
FAQs: Window AC Cleaning & Maintenance Guide
Q1: What’s the ideal frequency for cleaning my window AC unit in general? At a minimum, clean the filter every 2–4 weeks while in regular use, and do a full deep clean once per year before summer. Increase the frequency if you have pets, allergies, or heavy daily use.
Q2: Is it possible to clean the coils with a pressure washer? No. High-pressure water can easily bend the delicate fins and damage the coils. Always use a garden hose on a low setting or a spray bottle.
Q3: My window AC has a musty smell. What’s causing it? A musty smell typically indicates mold or mildew growing inside the unit — most commonly in the drain pan or on the evaporator coils. A thorough deep clean with coil cleaner and diluted bleach in the drain pan should fix the problem.
Q4: Should I use my AC in “fan only” mode to save energy? Fan-only mode consumes far less energy than cooling mode and can help circulate air on cooler days. It’s a good habit when you only need mild air movement, not active cooling.
Q5: Can I leave my window AC in during winter? In colder climates, it’s best to remove and store the unit. Cold air can seep in around the unit and increase heating costs. If you have to leave it in, use a winter-friendly AC cover.
Q6: How do I know if my window AC has a refrigerant leak? Signs include ice buildup on the coils, warm air blowing when the unit is set to cool, a hissing noise near the unit, or a sudden decline in cooling power. Refrigerant leaks require a licensed technician — this is not a DIY fix.
Q7: How long do window AC units last on average? With regular maintenance, a good window AC unit can last 10–15 years. Neglected units often fail within 5–7 years.
Wrapping It All Up
A window AC is not a “set it and forget it” appliance.
Just like a car, a bike, or any machine you rely on — it works best when you take care of it. These seven habits from this window AC cleaning & maintenance guide are not complicated. They don’t require special skills or expensive tools. But done consistently, they can reduce your energy bill, improve your indoor air quality, prolong the life of your unit, and keep you cool when it counts most.
Start small if you need to. Clean your filter this week. Check your window seal this weekend. Build the habit one step at a time.
Because the best time to take care of your window AC is before it breaks — not after.