

Meta Description: 4 Quick Window AC Cleaning & Maintenance Guide fixes that worked for me — how simple DIY steps rescued my unit and went from emergency bills to manageable energy payments in a single summer.
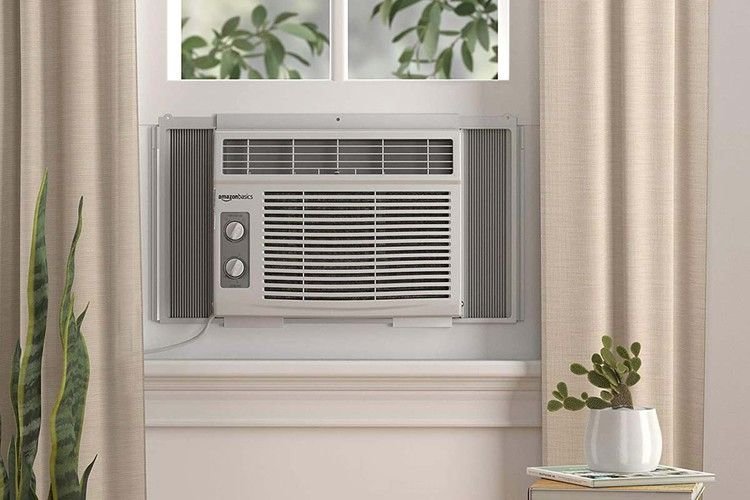
My AC Was Slowly Dying, and Here Are 4 Quick Window AC Cleaning & Maintenance Guide Fixes That Saved My AC
Believe us, there is no worse time for a window AC unit to stop cooling than on a hot summer day.
Last July, mine began blowing warm air. It was rattling a bit. And my electric bill shot up $40 in one month.
I almost called a technician. But before I did, I made the decision to dig in and find out what was wrong myself.
What I found surprised me. The problems weren’t complicated. They didn’t need special tools or professional expertise. All it took to restore my unit completely were four easy fixes that are all basic cleaning & maintenance steps for window AC units.
In this article, I will share step by step how I did it. So you can do the same.
Breaking Down Why Window AC Units Fail (And It’s Not What You Think)
When their AC breaks, most people think there was some kind of mechanical failure or defective part.
But in most cases? It’s dirt, clogs, and neglect.
A window AC blows warm air in, passes it over a coil that’s cold, then sends cool air back out. That process is disrupted when dust, mold, and debris build up inside the unit.
Here’s what that buildup really does:
| Problem | Cause | Effect on AC |
|---|---|---|
| Reduced airflow | Dirty filter | Less cool air output |
| Ice on coils | Blocked airflow | Unit stops cooling |
| Musty smell | Mold in drain pan | Poor air quality |
| High energy bill | Dirty condenser coils | Motor works harder |
| Rattling noise | Loose parts + debris | Wear and tear |
These are all fixable. And they do not need a service call.
Before You Begin: What You’ll Need
Before getting into fixes, collect a few basic supplies. You likely already have many of these at your home.
- Screwdriver (flathead and Phillips)
- Soft brush or old toothbrush
- Vacuum cleaner with a brush attachment
- Spray bottle with warm water
- Mild dish soap
- Fin comb (optional but helpful)
- Coil cleaner spray (found in hardware stores)
- Clean cloths or paper towels
- Gloves and a face mask
Safety first: Unplug your AC unit before cleaning it. Never skip this step.
Fix #1 — Cleaning the Air Filter (The Most Under-Explored Step)
This was the first thing I looked at. And that was the grossest thing I found.
My filter felt like a gray sheet of felt. It was completely clogged with dust, pet hair, and what I can only describe as “mystery fluff.”
A filthy filter is the #1 reason window ACs lose their cooling power. That system breaks down when air struggles to move through.
Removing and Cleaning the Filter
Step 1: Disconnect the unit from the wall.
Step 2: Open the front panel of the AC. This snaps off or slides up on most units.
Step 3: Gently pull the filter out. Do not shake it — you don’t want to send all that dust into the room.
Step 4: Move it outside or to a sink. Lightly tap it to dislodge loose debris.
Step 5: Rinse under running warm water. If it’s especially dirty, add a few drops of dish soap to warm water and lightly scrub with a soft brush.
Step 6: Air dry it thoroughly — a minimum of 30 minutes — before replacing it.
Step 7: Push it back in and shut the panel.
How Frequently Do You Need to Clean the Filter?
| Usage Level | Cleaning Frequency |
|---|---|
| Light use (a few hours/day) | Once a month |
| Regular use (8+ hours/day) | Every 2 weeks |
| Heavy use + pets/allergies | Every 7–10 days |
My airflow dramatically improved almost immediately after I cleaned this. The fan sounded stronger. Within an hour, the air felt cooler.

Fix #2 — Clean the Evaporator and Condenser Coils
This one took me quite a bit longer, but it had the biggest effect.
The evaporator coil is the part that cools the air. The condenser coil dissipates heat to the outside. Both can become layered in dirt and dust as time goes on.
Dirty coils make your AC work harder to accomplish the same task. That wastes electricity and leads to overheating.
Signs Your Coils Need Cleaning
- The unit just runs and doesn’t cool the room
- The coils form frost or ice
- The unit has a musty or burnt odor
- Your utility bills have ticked upward for no obvious reason
The DIY Way of Coil Cleaning
Step 1: Unplug the unit. Take it out of the window if that’s possible, or work cautiously in place.
Step 2: Take off the outer casing. It’s generally held in place by four to six screws. Keep track of the screws.
Step 3: Remove the loose dust from both coils using a vacuum with a soft brush attachment. Take your time — coil fins are thin and easily bent.
Step 4: Use a no-rinse coil cleaner spray (found at hardware stores for $10–$15). Spray it right on the coils. The foam will loosen dirt, which drains out of the unit.
Step 5: For the condenser coil (the side that faces outside), if you’ve taken the unit out, a garden hose on a gentle setting will do. Flush from the inside out to force dirt outside.
Step 6: Leave it all to dry completely before reassembling.
Fixing Bent Fins
When I opened up my unit, I saw a number of bent fins on the coils. Bent fins disrupt airflow and decrease efficiency.
A fin comb — a very inexpensive tool you can buy for $5–$10 — clears them up quickly. Simply run it along the fins in the direction they are meant to go.
This, in itself, can significantly improve airflow.
Pro Tip: For a deeper dive into coil cleaning techniques and other seasonal upkeep steps, check out Window AC Maintenance — a great resource for keeping your unit running efficiently year after year.
Fix #3 — Clearing the Drain Pan and Drain Line
This is what was making my unit smell musty: an absolutely disgusting, stagnant drain pan filled with dirty water and mold.
Window AC units strip moisture from the air as they cool. That moisture drips into a drain pan at the bottom of the unit and then drains out through a small drain line or drain hole.
When that pan becomes filled with buildup, or the drain gets clogged, water stagnates and mold grows. Fast.
What Happens When the Drain Gets Clogged
- Water spills over the pan and seeps into your home
- Mold and bacteria breed inside the unit
- You get stale air pumped directly into your room
- Excess moisture can cause the unit to freeze up
How to Clean the Drain Pan and Line
Step 1: With the unit unplugged and casing removed, find the drain pan. It lies at the very bottom of the unit.
Step 2: Soak up the standing water with a cloth or small sponge.
Step 3: Wipe the pan down with a mix of half warm water and half white vinegar. Vinegar combats mold and removes mineral deposits without harming the unit.
Step 4: Locate the drain hole (typically at the rear bottom of the pan). Clear any blockage with a thin wire, a straightened paper clip, or a small brush.
Step 5: Pour a little of the vinegar solution through the drain hole to flush it out.
Step 6: Wipe everything dry with a clean cloth, then put it back together.
Preventing Future Clogs
| Preventive Action | Frequency |
|---|---|
| Wipe drain pan with vinegar | Monthly |
| Inspect drain hole for blockages | Every 2 months |
| Run AC on fan-only mode for 30 mins | After heavy rainfall |
| Use an AC drain pan tablet | Every 3 months |
Drain pan tablets (around $8 for a pack) dissolve slowly and inhibit the growth of both algae and mold. I started using them after this experience and my unit has remained odor-free ever since.
Fix #4 — Inspecting and Sealing the Window Installation
This one hit me totally out of the blue.
I figured my AC was simply working harder than necessary due to the grime. But even after cleaning everything, the room still wasn’t cooling down as fast.
Then I spotted it: gaps around the side panels of my window unit. Warm outside air was coming directly into the room. At the same time, cold air was leaking out.
In other words, my AC was battling itself.
Why People Don’t Realize How Important Window Sealing Is
A poorly sealed window installation can reduce your AC’s effective cooling by 20–30%. You’re paying to cool air that quickly escapes outside.
Common sealing problems include:
- Foam strips on the side accordion panels that are worn out
- Gaps between the window frame and the AC unit
- Cracks in the accordion-style side panels
- A unit that’s tilted ever so slightly the wrong way
How to Properly Seal Your Window AC
Step 1: Pull the accordion side panels out fully to fill any gap between the AC and window frame.
Step 2: Inspect the foam weatherstripping along the edges. Replace it if it’s crumbled, flat, or missing. You can purchase foam weatherstrip tape at any hardware store for approximately $5–$8.
Step 3: Apply the new foam tape along the window frame where the AC makes contact.
Step 4: For wider gaps that foam tape won’t cover, use foam backer rod or outdoor caulk.
Step 5: Check your unit’s tilt. Window ACs must tilt slightly toward the back (about half an inch) so water can drain out the rear. A forward tilt makes water drip inside.
Step 6: While the unit is running, use your hand to feel around the edges from inside the room. If cool air is escaping anywhere, there’s still a gap to seal.
The Right Tilt Angle
| Tilt Direction | Result |
|---|---|
| Slightly backward (correct) | Water drains outside, unit runs efficiently |
| Level (neutral) | Water may sit in pan, risk of dripping inside |
| Forward tilt (wrong) | Water drips inside, possible wall/floor damage |
After I resealed the gaps and adjusted the tilt, my room hit the target temperature nearly 15 minutes sooner. That was a huge difference.
How Much Can These Fixes Save You, Really?
Let me put some numbers on it.
Before I made these four fixes, my window AC was:
- Running almost constantly to maintain temperature
- Adding roughly $40–$50 extra to my monthly electric bill
- Smelling of mildew every time it turned on
- Making a low rattling sound that worsened over time
After the fixes:
- The unit reaches target temperature faster and cycles off more often
- My bill returned to normal levels by the end of the first month
- Zero musty smell
- The rattle is completely gone
According to the U.S. Department of Energy, a clean and well-maintained air conditioner will consume 5–15% less energy than one that has been neglected. For one window unit operating throughout the summer, that amounts to substantial savings.
Regular Maintenance Checklist to Keep Your AC Running Strong
Do not wait until problems emerge. Build a simple routine.
Before Summer (Spring Startup Checklist)
- Clean or replace the air filter
- Clean both sets of coils
- Flush the drain pan and drain line
- Inspect and replace weatherstripping if necessary
- Test the unit before the hot weather arrives
During Summer (Monthly Checklist)
- Clean the filter every 2–4 weeks
- Wipe the drain pan with vinegar
- Listen for strange sounds or lack of airflow
- Check that the window seal is still tight
End of Season (Fall Shutdown Checklist)
- Do a full clean of all components
- Allow the unit to dry completely
- Store it in a dry place or use a weatherproof AC cover
- Take note of any repairs needed before next season
Troubleshooting Window AC Problems and What They Mean
| Symptom | Most Likely Cause | Fix |
|---|---|---|
| Warm air blowing | Dirty filter or coils | Clean filter and coils |
| Water dripping inside | Forward tilt or clogged drain | Adjust tilt, clear drain |
| Musty smell | Mold in drain pan | Clean pan with vinegar |
| Rattling noise | Loose parts or debris | Open and inspect unit |
| Unit freezing up | Blocked airflow or low refrigerant | Clean filter; call a tech if needed |
| High electric bill | Dirty coils or poor sealing | Full cleaning + reseal window |
| Unit won’t turn on | Check power, settings, circuit | Reset breaker, check cord |
When to Call a Professional
These four fixes cover the majority of window AC problems. But some issues do require professional help.
Call a technician if:
- It’s still blowing warm air after cleaning the coils and filter
- You think there may be a refrigerant leak (you’ll see ice build up over and over again)
- The compressor is producing a grinding or clicking sound
- Electrical components look burned or damaged
- It constantly trips the circuit breaker
Handling refrigerant requires a certified technician. It’s not a DIY job. Don’t attempt it.
FAQs Related to Window AC Cleaning & Maintenance
Q: How often should I clean my entire window AC unit? A: An extensive cleaning at the beginning and end of each cooling season is best. During normal use, your filter needs a light clean every 2–4 weeks.
Q: Should I clean the drain pan using bleach? A: Stick with white vinegar instead. Bleach can corrode the rubber seals and plastic parts inside the unit. Vinegar works just as well and is much safer for AC components.
Q: Is it okay to spray water on AC coils? A: Yes, but be gentle and use a low stream. Do not spray directly on electrical components. If you’re unsure, go for a no-rinse coil cleaner spray instead — it’s safer and easier.
Q: My air conditioner smells like fish or chemicals. What does that mean? A: A fish or chemical smell can signal an electrical problem — perhaps burning insulation or wiring. Switch off the unit immediately and call a professional to inspect it.
Q: How do you know if your AC needs refrigerant? A: Symptoms include coils that keep freezing over, warm air blowing even after cleaning, and a hissing sound from the unit. Refrigerant issues must be addressed by a licensed HVAC technician.
Q: Can a dirty air filter really make that big a difference? A: Absolutely. A dirty filter can block airflow by as much as 40%, making the unit work harder and cool less effectively. It’s the simplest fix with the most measurable impact.
Q: Should I remove my window AC every winter? A: In colder climates, yes. Taking it out and storing it prevents cold air drafts and protects the unit from winter weather damage. If you leave it in, use a fitted outdoor cover.
Q: How long does a window AC unit last on average? A: With regular maintenance, a window AC unit can last 10–15 years. Most neglected units burn out within 5–7 years.
Wrapping It All Up
Four fixes. That was all it took to resurrect my window AC unit.
A clogged filter. Dirty coils. A gunked-up drain pan. And gaps in the window seal that let all that cool air leak out.
None of those problems were complicated. None needed specialized tools or professional assistance. They just needed some time, a handful of basic supplies, and the inclination to open up the unit and find out what was happening.
If your window AC isn’t working the way it should, don’t run out and buy a new one or spend $100+ on a service call. Start with this window AC cleaning & maintenance guide first.
Clean the filter. Clean the coils. Clear the drain. Seal the gaps.
You have no idea how much life is left in that unit.
Have you used any of these fixes on your AC unit? Leave a comment and tell me what worked for you — or ask a question if you’re stuck on any of the steps.