

Meta Description: Window AC cleaning & maintenance guide fixes for water leakage — discover 10 simple, tried-and-true steps to eliminate water leaks, protecting your home and keeping your unit running cool!
10 Easy Window AC Cleaning & Maintenance Guide Fixes for Water Leakage
Is your window air conditioner leaking water inside your room? You’re not alone. Water leakage is one of the most common problems homeowners face with window AC units. The good news? Most problems are simple — and most repairs are something you can do yourself, without calling a technician.
This window AC cleaning & maintenance guide will take you through 10 simple, practical fixes. Whether your problem involves a tiny drip or a steady stream of water, at least one of these solutions is going to take care of it.
Let’s get into it.
Should I Be Concerned if My Window AC Is Leaking Water?
Before jumping into solutions, it’s helpful to understand why this occurs.
Window AC units operate by drawing warm air from your room over cold coils. This process makes moisture in the air condense — like a cold glass of water sweating on a hot day. That moisture is meant to drain outside. When something impedes or interrupts that drainage, water goes where it doesn’t belong: your floor, walls, or windowsill.
Below are some of the typical reasons this occurs:
| Cause | How Common |
|---|---|
| Clogged or dirty air filter | Very Common |
| Blocked drain hole | Very Common |
| Improper AC tilt | Common |
| Frozen evaporator coils | Common |
| Low refrigerant levels | Less Common |
| Dirty condensate pan | Common |
| Cracked or corroded drain pan | Less Common |
| Loose or damaged seals | Common |
| High indoor humidity | Situational |
| Old or worn-out unit | Less Common |
Now let’s fix them — one by one.
Solution #1 — Clean or Replace Your Air Filter Immediately
This is the first thing you should always check.
A dirty air filter restricts airflow over the evaporator coils. When airflow is restricted, those coils get too cold and freeze over. As the frozen coils eventually defrost, the excess water overflows the drain pan — and leaks into your room.
How to Clean the Filter of Your Window AC
- Turn off and unplug the unit.
- Unclip the front panel (or undo two screws).
- Slide out the filter.
- Hold it up to light — if you can barely see through it, it’s dirty.
- Wash it under warm running water.
- Allow it to air dry completely before replacing it.
- Do not operate your AC without the filter in place.
How often should you do this? During heavy use seasons, clean the filter every 2–4 weeks. If you have pets or live in a dusty environment, clean every 2 weeks.
💡 Helpful Tip: If you see any gray, matted, or moldy sections on your filter, don’t wash them — throw the filter away. Replacement filters are only a few dollars.
Solution #2 — Clear the Drain Hole in the Rear of the Unit
Every window AC has a small drain hole (sometimes referred to as a weep hole) at the bottom back of the unit. Its only job is to allow condensation water to drain outside. When this hole becomes clogged with dirt, algae, or debris, water backs up — and leaks inside.
How to Unclog the Drain Hole
- Inspect the rear side of your AC unit (the part facing outside).
- Look for the small hole or slot near the bottom.
- Gently poke through the hole with a thin wire, pipe cleaner, or toothpick.
- Give it a little spray with water from a spray bottle.
- Verify whether water now runs unobstructed outdoors.
This repair takes less than 5 minutes and addresses a significant number of leaking issues.
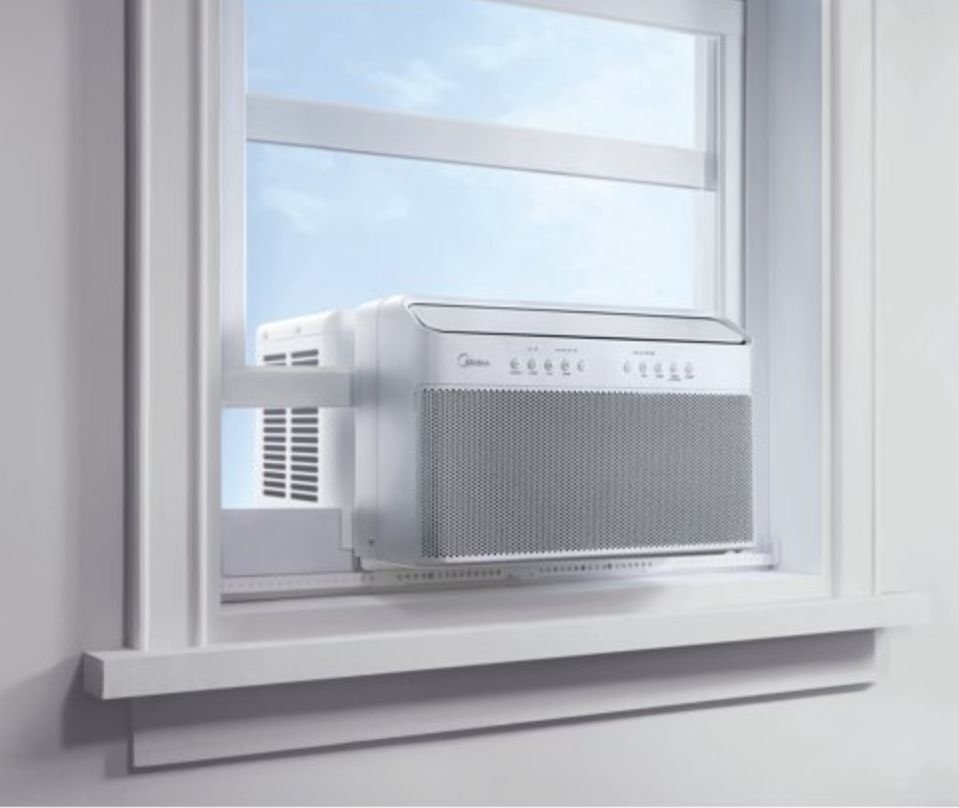
Fix #3 — Make Sure Your AC Unit Is Tilted Properly
Here’s something a lot of people don’t know: window air conditioners are designed to tilt slightly toward the outside. We’re talking about a 1/2 inch to 1 inch drop from front to back. This angle helps gravity keep water draining outside instead of pooling inside.
If your unit was installed level — or tilting inward — water will pool inside and drip into your room.
How to Check and Fix the Tilt
- Use a simple bubble level tool placed on top of the unit.
- The bubble should rest slightly toward the front, meaning the back sits lower.
- To adjust the tilt, slide a small wooden shim under the front corners of the unit.
- If your AC sits in a window bracket, loosen the bracket screws, angle it correctly, and retighten.
Caution: Don’t tilt it too far. An angle greater than 1 inch can cause the unit to shake, make noise, or even fall out of the window.
Solution #4 — Thaw Out Frozen Evaporator Coils
When you notice ice forming inside your AC unit, that’s not a good sign. Water begins to leak out when ice melts more quickly than the drain pan can handle.
Signs Your Coils Are Frozen
- Reduced airflow from the vents
- AC running but not cooling well
- Visible ice on the coils or refrigerant lines
- Water leaking only when the unit operates or shortly after it turns off
How to Safely Thaw Frozen Coils
- Turn the AC off immediately. Don’t keep running it — this makes the ice worse.
- Set the fan to “fan only” mode (no cooling). This blows room-temperature air over the coils.
- Allow 1–3 hours for the ice to completely melt.
- Place towels underneath the unit to soak up the drip.
- Once thawed, clean the filter and check the drain hole before turning it back on.
If your coils keep freezing repeatedly, the root cause might be a dirty filter, blocked vents, or low refrigerant — all topics covered in this guide.
Fix #5 — Clean Out the Condensate Drain Pan
The condensate pan (also called the drip pan) sits below the evaporator coils and collects all the condensation water. Over time, this pan can become coated with algae, mold, and sludge. When dirty enough, it can clog the drain outlet or even develop tiny cracks.
How to Clean Your Condensate Pan
| Step | What to Do |
|---|---|
| Step 1 | Unplug the unit and open the casing |
| Step 2 | Locate the drain pan below the coils |
| Step 3 | Remove any standing water with a sponge or wet-dry vac |
| Step 4 | Mix 1 cup of white vinegar with 1 cup of warm water |
| Step 5 | Scrub the pan with a soft brush using the vinegar solution |
| Step 6 | Rinse and dry before reassembly |
White vinegar is a natural mold and algae killer. You can also drop a condensate pan tablet into the pan — they dissolve slowly and prevent algae buildup for months.
Fix #6 — Seal the Gaps Around Your AC Unit
When you look around the edges of your window AC, do you see spaces between the unit and the window frame? Those gaps allow hot, humid outdoor air to slip inside — and that warm, moist air meets the cold parts of your unit and creates excess condensation.
More condensation = more water = more leakage.
How to Seal Window AC Gaps
- Use foam weather-stripping tape along the top and sides of the window opening.
- For bigger gaps, use foam insulation strips made specifically for window ACs.
- Inspect the accordion side panels — if they’re cracked or missing, replace them.
- Use AC window seal tape for a clean, tight seal on all edges.
Proper sealing also improves your AC’s efficiency and lowers your electric bill — a win-win.
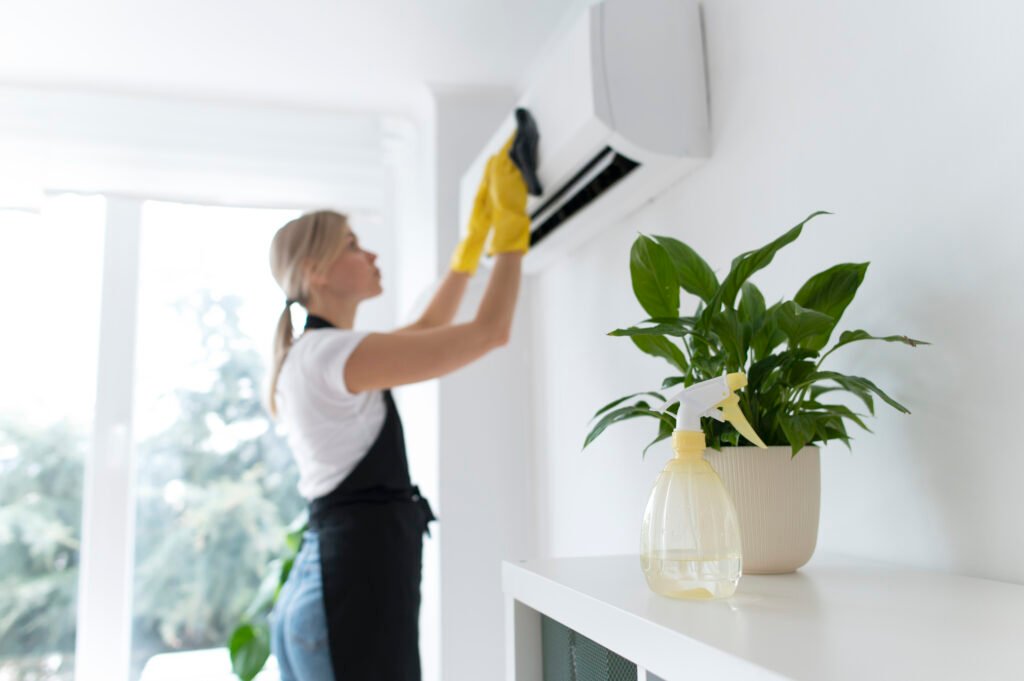
Solution #7 — Check and Clean the Evaporator Coils
Dirty evaporator coils don’t just cause freezing — they also reduce the unit’s ability to absorb heat efficiently. When coils are coated in dust and grime, condensation drips unevenly instead of flowing properly into the drain pan.
For more detailed cleaning tips and seasonal care routines, visit Window AC Maintenance — a dedicated resource covering everything you need to keep your unit running at its best.
Cleaning the Evaporator Coils Step-by-Step
- Unplug the unit completely.
- Remove the front panel and filter.
- Locate the coils — they resemble a row of thin metal fins.
- Use a soft brush or fin comb to gently remove dust from the coil surface.
- Spray with a no-rinse coil cleaner (available at any hardware store).
- Let the foam cleaner work for 10–15 minutes; then it drains on its own.
- Reassemble and test.
Never use a high-pressure hose on coils. The fins are very delicate and bend easily. Once bent, they restrict airflow and cause further problems.
Fix #8 — Check for Refrigerant Levels That Are Too Low
This is the one fix on this list that you cannot do yourself — and that’s fine. Low refrigerant (also called Freon) causes the evaporator coils to run much colder than they should. This results in rapid freezing and then heavy melting, which overwhelms the drainage system.
Signs That Indicate Low Refrigerant
- Your AC blows air but the room stays warm
- You hear a hissing or bubbling noise from the unit
- Ice forms on the refrigerant lines outside the unit
- Your electricity bill suddenly spikes
If you notice any of these signs, contact a certified HVAC technician. They’ll test refrigerant levels and recharge the system if needed. In some cases, a refrigerant leak may need to be patched first.
⚠️ Important: Refrigerant handling requires a special license. Never attempt to add refrigerant yourself.
Fix #9 — Replace a Cracked or Rusted Drain Pan
If cleaning the drain pan (Fix #5) did not stop the leak, the pan itself might be the source of the problem. Over time, especially in humid climates, drain pans can rust through or crack. Even the tiniest crack can allow water to drip directly onto your floor instead of draining outside.
How to Identify a Damaged Drain Pan
- Pour a small amount of water directly into the drain pan.
- Watch carefully — does water drip from the bottom of the unit?
- If yes, the pan is cracked or has a hole.
What to Do About It
- Temporary fix: Use waterproof epoxy or drain pan repair tape to seal the crack.
- Permanent fix: Order a replacement drain pan for your specific AC model. Replacement pans typically cost between $15–$40 and are easy to swap in yourself.
Fix #10 — Give Your Entire AC a Deep Clean Once a Year
All the individual fixes above work best when paired with a full annual cleaning. Think of it like an oil change for your car — it keeps everything running right and prevents problems before they start.
Annual Window AC Deep Clean Checklist
| Task | Frequency |
|---|---|
| Clean or replace air filter | Every 2–4 weeks |
| Clear drain hole | Every 1–2 months |
| Clean condensate pan | Every 3–6 months |
| Clean evaporator coils | Once a year |
| Clean condenser coils (outside) | Once a year |
| Check tilt and seals | Once a year |
| Inspect for cracks and rust | Once a year |
| Check refrigerant (by tech) | Every 2–3 years |
How to Clean the Outside (Condenser) Coils
The condenser coils face outside and are exposed to dust, pollen, leaves, and bugs.
- Unplug the unit.
- Remove the outer casing (usually 4–6 screws on the back).
- Use a garden hose on its gentlest setting to rinse the coils from the inside out.
- Allow everything to dry completely before reassembly.
A clean condenser operates more efficiently, puts less strain on the compressor, and produces less excess condensation. According to the U.S. Department of Energy, regular cleaning and maintenance of room air conditioners can meaningfully improve energy efficiency and extend the life of your unit.
How to Know Which Fix You Actually Need
Still not sure where to start? Use this quick diagnostic guide:
- Water leaks only when AC is running → Check the drain hole and condensate pan first.
- Water pools after the AC shuts off → Likely frozen coils melting. Check filter and airflow.
- Water drips from the front panel → Tilt issue or overflowing drain pan.
- Water collects under the unit inside → Cracked drain pan or blocked drain hole.
- AC not cooling + leaking → Possible low refrigerant. Call a technician.
- Leak started suddenly after weeks of normal use → Check for a newly clogged filter or drain hole.
Smart Habits That Stop AC Water Leakage Before It Starts
The best fix is one you never need. Build these habits and you’ll rarely deal with dripping water again:
- Run fan-only mode for 30 minutes before turning the AC off. This dries out the coils and pan before shutdown.
- Keep indoor humidity below 60%. Use a dehumidifier if needed.
- Don’t block the vents. Keep furniture and curtains away from the front of the unit.
- Store the unit properly in winter. Cover it or remove it entirely to prevent rust and pest damage.
- Schedule a checkup every spring before the cooling season begins.
Common Questions About Window AC Water Leakage
Q: Is it normal for a window AC to drip a little water outside? Yes, completely normal. Any water dripping from the back of the unit on the outside is just condensation draining properly. That’s the way it is designed to work.
Q: Why is my AC leaking water inside but not outside? Most of the time it’s due to a clogged drain hole, improper tilt, or an overflowing condensate pan. Start with Fix #2 and Fix #3.
Q: Can I run my window AC while it’s leaking? You can, but you shouldn’t for too long. Operating it while it’s leaking can lead to water damage to your walls, floors, and the unit itself. Fix the issue first.
Q: How often should I clean my window AC to avoid leaks? Clean the filter every 2–4 weeks during active use. Perform a full unit cleaning at least once a year, ideally before summer.
Q: Does leaking water mean my AC is low on refrigerant? Not always. Refrigerant problems are one possible explanation. Try the simpler fixes first — dirty filters, clogged drains, and tilt issues are far more common.
Q: How much does it cost to fix a leaking window AC? Most fixes are free or cost under $20 if you do them yourself. The exception is refrigerant issues, which require a technician and typically cost $100–$300 depending on your area and unit size.
Q: Can mold grow inside a leaking window AC? Yes, and it’s a real concern. Standing water and damp surfaces inside the unit create ideal conditions for mold growth. It’s another reason to fix leaks quickly and clean the unit regularly.
Wrapping It All Up
A leaking window AC is frustrating — but it’s almost never a reason to buy a new unit. Chances are, one of these 10 fixes from this window AC cleaning & maintenance guide will solve your problem completely.
Start with the simplest ones: clean the filter, clear the drain hole, and check the tilt. These three fixes alone solve the majority of leaking issues.
If those don’t do the trick, move on to the coils, the drain pan, and the seals. And if you’ve tried everything and the unit is still acting up, having a licensed technician check the refrigerant is your next step.
Keep up with regular maintenance, clean the filter often, and give the unit a full deep clean once a year. Do that, and you’ll stay cool all summer — without a single drip on your floor.