

5 Quick Window AC Cleaning Steps for Beginners
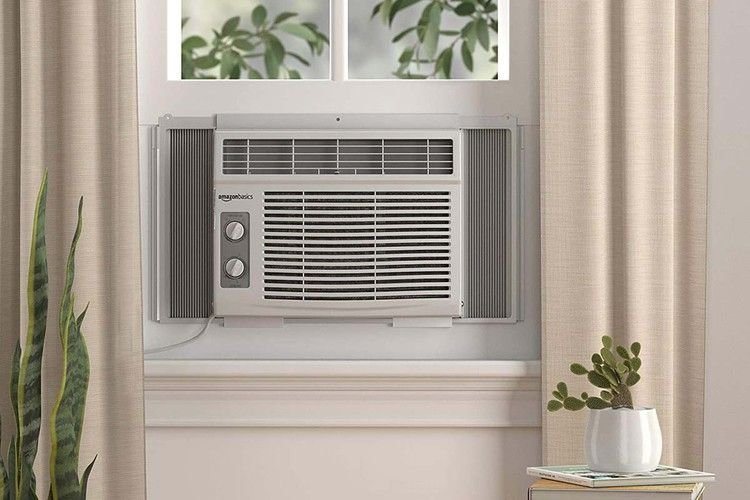
There is something oddly satisfying about the steady hum of a window air conditioner on a hot afternoon. It becomes part of the background, almost invisible, until the day it starts to smell a little off, or the airflow feels weaker than it should. Most people assume something is broken at that point. In reality, the issue is often far simpler: the unit just needs a proper cleaning.
I didn’t always know this. Like many beginners, I used to think cleaning a window AC was complicated, risky, and best left to professionals. But after dealing with rising electricity bills and a unit that struggled every summer, I realized that basic cleaning isn’t just manageable—it’s essential. Over time, I developed a simple routine that anyone can follow, even with zero technical experience.
This guide walks through five quick cleaning steps that make a noticeable difference. It’s not just a checklist—it’s a practical, lived-in approach to understanding your AC and keeping it running smoothly.
step one: unplug and prepare your space
Before touching anything, unplug the unit. It sounds obvious, but it’s surprisingly easy to forget when you’re focused on cleaning. Electricity and water are not a good combination, and even a small oversight can lead to damage or injury.
Once the unit is unplugged, take a moment to prepare your workspace. Place an old towel or plastic sheet beneath the AC, especially if it’s still mounted in the window. Dust, debris, and sometimes even small clumps of dirt will fall during cleaning, and having something underneath saves you from extra work later.
If possible, open a nearby window or ensure the room is well ventilated. Cleaning tends to stir up dust, and good airflow makes the process more comfortable.
What I’ve learned over time is that preparation makes everything smoother. When you rush into cleaning without setting up properly, you end up stopping halfway to grab supplies or clean up spills. A few minutes of preparation can save you a lot of frustration.
step two: remove and clean the front filter
The front filter is the easiest and most important part to clean. It’s also the part that collects the most visible dust. If your AC isn’t cooling properly, this is usually the first place to check.
Gently remove the front panel. Most window AC units have clips or tabs that make this simple. Behind it, you’ll find the filter—a mesh screen designed to trap dust and particles from the air.
Take the filter out carefully. If it’s been a while since your last cleaning, you’ll likely see a layer of gray dust covering it. Sometimes it looks worse than expected, especially in homes with pets or in dusty environments.
Rinse the filter under running water. You don’t need any harsh chemicals; plain water does the job well. If the dirt is stubborn, use a soft brush or even an old toothbrush to gently scrub it away. Avoid using excessive force, as the mesh can tear.
Let the filter dry completely before putting it back. This part is important. Reinstalling a wet filter can lead to mold growth inside the unit, which creates unpleasant odors and potential health issues.
From my experience, cleaning the filter alone can dramatically improve airflow. It’s one of those simple tasks that people overlook, yet it has an immediate impact.
step three: clean the evaporator coils
Behind the filter, you’ll find the evaporator coils. These thin metal fins are responsible for cooling the air, and they tend to collect dust over time. Unlike the filter, they require a bit more care.
Start by visually inspecting the coils. If they look dusty or slightly clogged, it’s time for a gentle cleaning. Use a soft brush or a vacuum cleaner with a brush attachment to remove loose dirt. Move slowly and avoid pressing too hard, as the fins can bend easily.
If the coils are particularly dirty, you can use a mild cleaning solution. Mix a small amount of dish soap with water and apply it lightly using a spray bottle. Let it sit for a few minutes, then wipe gently with a soft cloth.
One thing I learned the hard way is not to overdo it with water. These components are delicate, and too much moisture can seep into areas where it shouldn’t. A light touch is always better.
Cleaning the coils improves the efficiency of the AC. When dust builds up, it acts like a barrier, making it harder for the unit to transfer heat. As a result, the AC works harder and consumes more energy.
step four: clear the drain and check for blockages
Most beginners don’t even realize that window AC units have a drainage system. As the unit cools the air, it also removes moisture, which needs somewhere to go. That’s where the drain comes in.
Over time, dirt and debris can clog the drain, causing water to accumulate inside the unit. This can lead to leaks, strange noises, or even a musty smell.
To clean the drain, locate the small opening or channel at the bottom of the unit. Use a thin object like a pipe cleaner or a small brush to gently remove any visible blockages. Be careful not to push debris further inside.
If you notice standing water, tilt the unit slightly (if safe to do so) to help it drain. Some units are designed to tilt outward slightly when installed, allowing water to flow outside naturally.
This step might seem minor, but it makes a big difference. A clear drainage system prevents moisture buildup, which in turn reduces the risk of mold and unpleasant odors.
step five: wipe down the exterior and reassemble
After handling the internal components, don’t forget the exterior. Dust and grime often accumulate on the front panel, vents, and sides of the unit.
Use a damp cloth to wipe down these surfaces. For stubborn spots, a mild cleaning solution works well. Pay attention to the air vents, as they can trap dust that eventually gets blown back into the room.
Once everything is clean and dry, reassemble the unit. Place the filter back in its position, secure the front panel, and ensure everything fits properly.
Plug the AC back in and turn it on. The difference is usually noticeable right away. The airflow feels stronger, the air smells fresher, and the unit runs more quietly.
what makes these steps effective
These five steps work because they focus on the areas that matter most: airflow, cooling efficiency, and moisture control. You don’t need specialized tools or technical knowledge. What you need is consistency.
Cleaning your window AC once every few weeks during heavy use can prevent most common issues. It also extends the lifespan of the unit, saving you money in the long run.
I used to think maintenance was something you only did when something went wrong. Now I see it differently. Regular care keeps small problems from turning into big ones.
common mistakes beginners make
One of the biggest mistakes is using too much water. It’s tempting to think that more cleaning solution means better results, but that’s not the case. Excess moisture can damage internal components and create new problems.
Another mistake is skipping the drying process. Whether it’s the filter or any other part, everything should be completely dry before reassembly. Moisture inside the unit can lead to mold growth.
Some people also ignore the coils because they look intimidating. In reality, they just require a gentle touch. Avoiding them altogether means missing an important part of the cleaning process.
Finally, many beginners clean only when the AC stops working properly. By that point, dirt has already built up significantly. Regular cleaning is far more effective than occasional deep cleaning.
a small routine that makes a big difference
Cleaning a window AC doesn’t have to be a chore. Once you get used to it, the process becomes quick and almost automatic. It’s one of those habits that pays off immediately.
There’s also a sense of control that comes with it. Instead of relying on someone else to fix problems, you’re able to maintain your own equipment. It’s a small skill, but a useful one.
In my own experience, the difference between a neglected AC and a well-maintained one is night and day. The air feels cleaner, the cooling is more consistent, and the overall experience is better.
faqs
- how often should i clean my window ac unit
Ideally, you should clean the filter every two to four weeks during peak usage. A more thorough cleaning, including coils and drainage, can be done once every one to two months depending on how dusty your environment is. - can i use chemical cleaners on my ac components
It’s best to stick with mild solutions like water and a small amount of dish soap. Strong chemicals can damage delicate parts and leave residues that affect air quality. - what happens if i don’t clean my window ac
Neglecting cleaning leads to reduced efficiency, higher electricity bills, unpleasant odors, and potential health issues due to dust and mold buildup. - is it safe to remove the ac from the window for cleaning
It can be, but it’s not always necessary. For basic cleaning, you can leave it in place. If you do remove it, make sure you have proper support and assistance, as units can be heavy. - why does my ac smell bad even after cleaning the filter
The smell might be coming from the coils or drainage system. In that case, a deeper cleaning of those areas is needed to remove hidden dirt or mold. - do i need professional servicing if i clean it regularly
Regular cleaning reduces the need for professional servicing, but it doesn’t eliminate it completely. An annual check-up by a technician can help catch issues that aren’t visible during basic cleaning.
In the end, maintaining a window AC is less about technical skill and more about attention and consistency. These five quick steps are enough to keep your unit in good shape, even if you’re just starting out. Once you’ve done it a couple of times, it stops feeling like a task and starts feeling like a routine part of keeping your space comfortable.