

Meta Description: Window AC cleaning & maintenance guide tricks used in real life by AC technicians — 10 secret tips to boost efficiency, extend lifespan, cut energy bills quickly
10 Secret Window AC Cleaning & Maintenance Guide Tricks AC Technicians Used
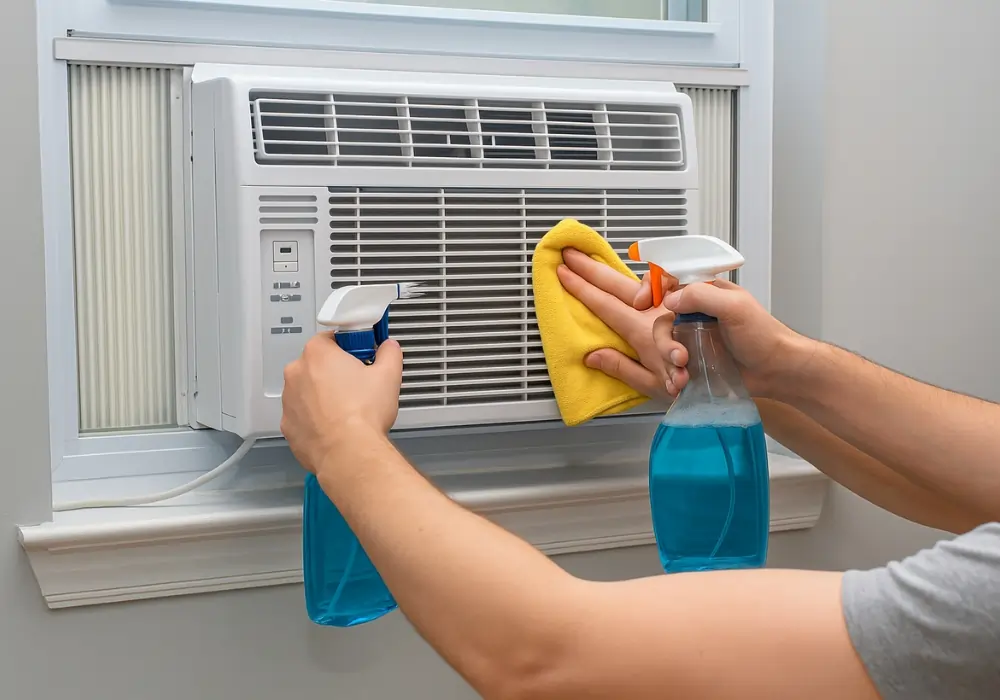
You clean your window AC unit once in a while, right? Perhaps you clean off the front panel or rinse out the filter. But professional AC techs do things that most homeowners never even consider doing — and those little steps really add up.
This window AC cleaning & maintenance guide shows you 10 tricks that technicians are trained to use in the field. These are not the generic tips you’ve read a hundred times. These are real, hands-on solutions that keep AC units running cooler, longer, and costing less to run.
Let’s get into it.
Before You Touch Anything — Safety First
Remember to always unplug your window AC unit before cleaning or inspecting it. This is non-negotiable.
Water and electricity do not mix in a good way. The unit could still hold a charge while being plugged in even if the unit is turned off. Unplug it from the wall entirely.
And use gloves when handling the internal coils and fins. The aluminum blades are razor-sharp, and can inflict deep cuts without notice.
Tip #1 — Inspect the Drain Pan Before You Begin
Most do-it-yourselfers go straight to the filter. Technicians begin with the drain pan.
The drain pan is located at the bottom of the unit and collects condensation. Over time, it becomes a swamp of algae, mold, and debris. A clogged drain pan makes water leak, emits foul smells, and in some cases lets mold spread into your room.
What technicians do:
- Pull the unit from the sleeve (or take the casing off)
- Find the drain pan on the bottom
- With a wet/dry vacuum, suck up all the standing water
- Use a 50/50 solution of white vinegar and warm water to scrub the pan
- To prevent algae regrowth, pour a little diluted bleach (1 tablespoon per gallon of water)
Repeat every 30–45 days in heavy-use seasons. It stops 90% of complaints about musty smells.
Tip #2 — Your Best Friend Is the Fin Comb
Take a good look at your window AC coils. Those slender metal strips are known as fins. The purpose of fins is to maximize airflow and heat exchange.
The problem? They bend easily. When bent, fins restrict airflow and make your unit work far harder than necessary.
Technicians use a fin comb — a simple, plastic tool that slips in between the fins and straightens them back out. You can get one online or at any HVAC supply store for less than $10.
How to use it:
- Detect bent or crushed fin sections
- Choose the correct comb teeth size (fit to your fin spacing)
- Slide gently downward in the direction of the fins
- Do it in small sections — take your time
Bent fins can be straightened out, which can increase airflow efficiency by up to 15%. That’s free cooling capacity you were physically holding back.
Trick #3 — Clean the Evaporator Coil, Not Only the Filter
Here’s a little-known fact: cleaning your filter and cleaning your coil is not the same thing.
The evaporator coil is located directly behind the filter. Even with a clean filter, airborne dust, pet hair, and grease gradually settle on the coil over time. A dirty evaporator coil keeps your AC from blowing cold air and jacks up your electricity bill.
Technicians apply a no-rinse coil cleaner spray — which you can find at any hardware store — to wash away buildup directly on the coil.
Steps technicians follow:
- Remove the filter
- Evenly apply the coil cleaner to the surface of the evaporator coil
- Allow to sit for 5–10 minutes (the foam will lift dirt and fall into the drain pan)
- No rinsing required — condensation washes it naturally when the unit is in operation
Do this once per cooling season for significantly cooler air output.
Tip #4 — Spray with Compressed Air on the Condenser Side
Window AC units have two sides: the cold side (facing your room) and the hot side (facing outside). People tend to only care about the interior. Technicians pay just as much attention to the outside.
Leaves, cottonwood fluff, insect nests, and road dust can collect on the condenser coil on the outdoor side. A blocked condenser means heat cannot properly escape, which is why your room never gets as cool as it ought to be.
What to do:
- Use a can of compressed air or a low-pressure garden hose
- Spray from the inside out (pushing debris outward)
- Never use high-pressure washers — they bend fins and damage the coil tubing
- Remove any visible debris on the outer grille with a soft brush
This is referred to by technicians as “flushing the condenser.” It is one of the quickest performance gains you can achieve.
Tip #5 — Use Vinegar Tablets to Fight Mold
Mold and mildew return despite a deep clean. Technicians use a straightforward hack to slow regrowth for months.
After cleaning, they drop one or two AC drain pan tablets (sometimes called condensate pan tablets) into the drain pan. These tablets dissolve gradually over 30–90 days, releasing agents that inhibit algae and mold growth.
Can’t find tablets? Put 2–3 cotton balls drenched in white vinegar around the corners of the drain pan. Replace them monthly.
This one trick gets rid of the persistent musty smell that drives so many people crazy each summer.
Trick #6 — Check and Reseal the Window Gaps
An AC with air leakage around the edges will constantly have to work to maintain temperature. Technicians always check the window seal — and most homeowners never do.
Look for these warning signs:
- You can feel hot air coming in around the unit
- Your room cools down more slowly than before
- Insects or dust are coming in from the sides
How technicians fix it:
- Get rid of old foam weatherstripping that is compressed or frayed
- Replace with new self-adhesive foam tape (¾ inch thickness fits most windows)
- Use AC side panel accordion wings snugly against the window frame
- For gaps at the top, apply a strip of rope caulk (it pulls off at season’s end)
Good sealing can reduce energy waste by 10–20%. That’s real money saved each month.
Tip #7 — Inspect the Fan Blades for Wobble and Buildup
Your window AC has fans for both the evaporator (inside) and the condenser (outside). Both collect dust and both can develop wobble as they age.
An unbalanced fan vibrates the entire unit, causes rattling sounds, and puts heavy load on the motor bearings.
Technicians spin the fan blades manually (with the unit unplugged) and check for:
- Resistance or grinding (bad bearings)
- Visible dust buildup on blade edges
- Loose blade mounting nuts
Cleaning the blades:
- Wipe each blade using a damp cloth or soft-bristle brush
- For heavy grease or sticky residue, use a little dish soap and warm water
- Dry completely before reassembling
Clean, balanced fan blades move more air with less noise and less power.
Quick Reference: What to Clean and How Frequently
| Component | Recommended Cleaning Frequency | Method |
|---|---|---|
| Air Filter | Every 2–4 weeks | Rinse with water, air dry |
| Drain Pan | Every 30–45 days | Vinegar/water scrub + drain tablet |
| Evaporator Coil | Once per season | No-rinse coil cleaner spray |
| Condenser Coil | Once per season | Compressed air or gentle water rinse |
| Fan Blades | Once per season | Damp cloth or soft brush |
| Fins | Once per season | Fin comb straightening |
| Window Seal | Every spring | Replace foam tape or rope caulk |
| Electrical Contacts | Every 1–2 years | Dry contact cleaner spray |
Trick #8 — Lubricate the Fan Motor Bearings
This one surprises most homeowners. Just like any mechanical equipment, AC motors have bearings that require lubrication.
When the bearings run dry, the motor strains more, overheats, and ultimately burns out. Replacement motors run $75–$200 or more. A $5 bottle of 3-in-1 oil or SAE 20 non-detergent oil can completely eliminate that problem.
What technicians do:
- Remove the casing of the unit to access the fan motor
- Find the oil ports on either end of the motor shaft (small rubber caps or exposed holes)
- Add 2–3 drops of lightweight machine oil into each port
- Spin the shaft by hand to distribute the oil
- Reassemble and test
Not every motor has oil ports — some are sealed and maintenance-free. Check your model’s manual before trying this step.
Warning Signs That Bearings Are Already Failing
- High-pitched squealing or grinding noise
- Motor overheats after short run time
- Fan spins slower than normal
Catching this early saves the motor. If you miss it, you’ll need to buy a new unit.
Trick #9 — Clean the Electrical Contact Points
Technicians don’t only clean the mechanical components — they inspect the electrical side, too.
As time passes, oxidation builds up on the electrical contacts inside your AC (specifically at the thermostat dial and control switches). Oxidized contacts cause:
- Inconsistent cooling
- The unit failing to start sometimes
- The thermostat clicking but the compressor not engaging
The fix:
- Get a can of electrical contact cleaner (CRC or WD-40 Contact Cleaner works great)
- With the unit unplugged, spray short bursts on each control switch and dial
- Activate the switch or move the dial back and forth a few times to spread the cleaner
- Leave to dry for 10 minutes before plugging back in
This is a $6 fix for an issue that many people send their unit out to the shop to remedy.
Tip #10 — Run a “Performance Test” After Each Cleaning
Technicians don’t just clean and walk away. They verify the unit is actually performing better. You should do the same.
Here’s a simple performance test you can conduct at home with no special equipment:
The Technician’s Post-Clean Checklist
Temperature Split Test:
- Set your AC to the coldest setting
- Let it run for 15 minutes
- Hold a thermometer at the air intake (return grille)
- Hold a thermometer at the air outlet (supply grille)
- The supply air should be 15–22°F cooler than the return air
If it’s less than 15°F, there’s still a problem with the unit — either a refrigerant issue or residual blockage in the coil.
Airflow Check:
- Hold a tissue or thin piece of paper in front of the output vent
- It should push outward firmly and consistently
- Weak or pulsing airflow indicates fan or filter issues
Sound Check:
- Listen for rattling, humming, squealing, or clicking
- A healthy unit should run with a steady, consistent hum
Logging these results after each cleaning allows you to catch decline over time before it turns into a breakdown.
💡 For more in-depth tips, seasonal checklists, and step-by-step visual guides, visit Window AC Maintenance — a dedicated resource for keeping your window AC running at its best year-round.
The Most Common Window AC Problems and Their Real Causes
| Problem | Most Likely Cause | DIY Fix |
|---|---|---|
| Warm air blowing | Dirty evaporator coil or low refrigerant | Clean coil; call tech if coil is clean |
| Musty smell | Mold in drain pan or on coil | Vinegar clean + drain tablet |
| Water leaking inside | Clogged drain or tilted installation | Clear drain, re-level unit |
| Loud rattling | Loose panel or debris in fan | Tighten screws, clear debris |
| Unit won’t start | Oxidized contacts or tripped breaker | Contact cleaner, check breaker |
| Short cycling (on/off) | Dirty filter or low refrigerant | Replace/clean filter first |
| Ice forming on coil | Blocked airflow or low refrigerant | Check filter and airflow clearance |
End-of-Season Storage — What Techs Do That You Don’t
Most people simply shut off the AC and forget about it until next summer. Properly maintained units last 12–15 years, while neglected ones fail in 5–7 — all because technicians prepare their equipment properly for storage.
End-of-season steps:
- Use the fan-only mode (without cooling) for 30–60 minutes to remove internal moisture
- Remove the filter and dry it thoroughly before storing
- Put a breathable AC cover (not plastic — that traps moisture) over the outside vent
- If you can, store indoors in a dry area
- Do not store on its side — it can damage the compressor
- Place a sachet of silica gel packets inside the unit to absorb residual humidity
According to the U.S. Department of Energy, proper maintenance and storage of room air conditioners can significantly reduce energy consumption and extend the life of the unit.
By following these steps, your unit starts up fresh and ready each spring — no weird smells, no sluggish startup, no surprises.
FAQs — Window AC Cleaning & Maintenance Guide
Q: How often should I clean my window AC unit? A: During high use, clean the filter every 2–4 weeks. Do a full deep clean (coils, drain pan, fins) once per cooling season — ideally in spring before it’s needed the most.
Q: Can I use a pressure washer to clean the condenser coil? A: No. High-pressure water bends fins and may puncture coil tubing. Instead, use a garden hose on a gentle setting or compressed air.
Q: What is that musty smell coming from my window AC? A: Mold and algae growing in the drain pan or on the evaporator coil. Clean both thoroughly with a vinegar solution and use drain pan tablets to inhibit regrowth.
Q: Is it safe to clean the inside of a window AC unit yourself? A: Yes — provided the unit is completely unplugged from the wall. Always clean or inspect with the power fully disconnected.
Q: My AC blows cold at first but then gets warm. What’s wrong? A: This is usually due to ice forming on the evaporator coil because of restricted airflow. Check your filter first. If that’s clean, have a technician check refrigerant levels.
Q: How can I tell if my window AC requires refrigerant? A: Refrigerant doesn’t “run out” unless it has leaked. Signs include ice on the coil, warm air blowing from a clean unit, and hissing sounds. This requires a licensed technician — it’s not a DIY job.
Q: Can cleaning actually reduce my electricity bill? A: Absolutely. A dirty coil or clogged filter makes the compressor work harder and run longer to achieve the same cooling. Routine maintenance can reduce energy consumption by 15–25%.
Q: What is the best no-rinse coil cleaner to use? A: Nu-Calgon Evap Foam No Rinse and AC-Safe Air Conditioner Coil Cleaner are both popular among technicians and available at hardware stores.
Wrapping It Up
A window AC unit is one of the hardest-working appliances in your home. It operates for hours a day in scorching heat, collecting dust, moisture, and grime the entire time. Most people treat it as a set-it-and-forget-it appliance — and then wonder why it breaks down early or drives up their electric bill.
The 10 tricks in this window AC cleaning & maintenance guide are what distinguish a unit that lasts a decade from one that fails after five years. None of them require professional tools or special training. It just takes a little time and care.
Start with the drain pan. Grab a fin comb. Spray the coil. Seal the window gaps. Check the fan. These are not complex steps — they’re just the steps that most people overlook.
Do this regularly, and your window AC will cool faster, smell fresher, run quieter, and cost less to operate. That’s the real secret that technicians generally don’t give away for free.