Meta Description: Window AC cleaning & maintenance guide every homeowner needs — discover 9 powerful steps to boost efficiency, cut energy bills, and extend your unit’s life.
9 Powerful Window AC Cleaning & Maintenance Guide Steps I Wish I Knew Earlier
There’s a point each summer when your window-unit AC stops blowing cold the way it once did. You crank it up higher. Nothing changes. The room stays warm. And you start to wonder if it’s time for a new unit.
The reality is: most of the time, it’s not broken. It’s just dirty and neglected.
A poorly-maintained window AC is working harder than it needs to. It uses more electricity. It cools less effectively. And over time, it breaks down more quickly than it should.
In this window AC cleaning & maintenance guide, you will find 9 powerful steps that can make a tremendous difference in the performance of your unit. These are just the things most people never think about doing — until something goes wrong.
Let’s make sure that doesn’t happen to you.
Before You Begin: What You’ll Need
You don’t need fancy tools. Most of what you need is already at home.
| Item | Purpose |
|---|---|
| Screwdriver (flathead & Phillips) | Remove panels and covers |
| Soft brush or old toothbrush | Clean fins and coils |
| Mild dish soap | Cleaning filter and housing |
| Spray bottle | Applying cleaning solution |
| Fin comb | Straighten bent fins |
| Vacuum with brush attachment | Removing dust and debris |
| Coil cleaner spray | Deep cleaning evaporator/condenser coils |
| Clean cloths or microfiber towels | Drying surfaces |
| Rubber gloves | Protect hands |
The first thing you must do is unplug the unit. This is non-negotiable. Safety always comes first, every single time.
Step 1: Shut It Down, Then Unplug It Completely
This may sound obvious, but it deserves to be said explicitly.
Never clean a window AC when it is plugged in.
Use the controls to power off the unit. Then unplug it from the wall. The power button should not be your only go-to. Electric components within the unit can still retain a charge, and having water or cleaning solutions come near live wires is hazardous.
Unplug and wait a few minutes. Always allow any internal components to cool completely before working on them.
If your unit is placed on a top window ledge, ensure you have a sturdy step stool or ladder. Don’t rush setting up. Rushing this step causes accidents.
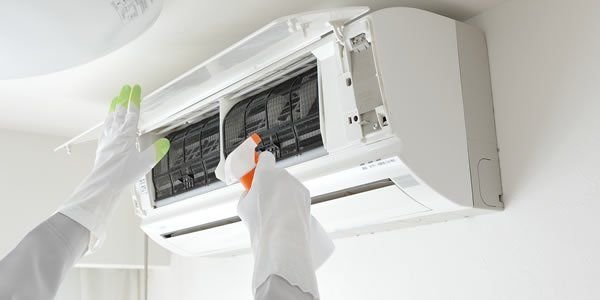
Step 2: Take Out and Clean the Air Filter (The Most Important Step)
The air filter is the first line of defense against dust, allergens, and debris. It captures everything that’s floating around your room — pet hair, pollen, dust mites, skin cells — before that air is cooled and recirculated.
When the filter gets clogged up, airflow decreases. The unit has to run overtime to push air through. Your power bill rises, and the cooling falls.
How to Remove the Filter
The front panel of most window AC units pops off with a gentle push or two screws. Once you remove the panel, you’ll see the filter — which is generally a thin, mesh-like screen that simply slides out.
How to Clean It
- Move the filter to an outdoor area or into a sink.
- Shake off loose dust first.
- Wash it under running warm water.
- Apply a bit of mild dish soap and scrub with a soft brush.
- Rinse well until the water runs clear.
- Allow it to air dry completely before replacing it.
Never insert a wet filter back into the unit. A wet filter is a breeding ground for mold and mildew.
How Often Should You Do This?
| Usage Level | Cleaning Frequency |
|---|---|
| Light use (a few hours/day) | Every 4–6 weeks |
| Moderate use (8+ hours/day) | Every 2–3 weeks |
| Heavy use or pets in the home | Every 1–2 weeks |
Just this step alone can increase the efficiency of your AC by up to 15%. This is the easiest win in all of this guide.
Step 3: Clean the Front Panel and Vents
At the same time the filter is drying, give the front panel — the one you see every day — some attention.
Dust collects in the vent slats quickly. That buildup isn’t just ugly. It cuts off airflow and makes the unit work harder than it needs to.
What to Do
- Use a damp cloth and a drop of dish soap to wipe the outer surface.
- Clean between the vent slats with an old toothbrush or cotton swabs.
- Before replacing the panel, dry everything using a clean cloth.
Avoid using harsh chemical sprays on the plastic panels. Over time, the surface can crack or discolor.
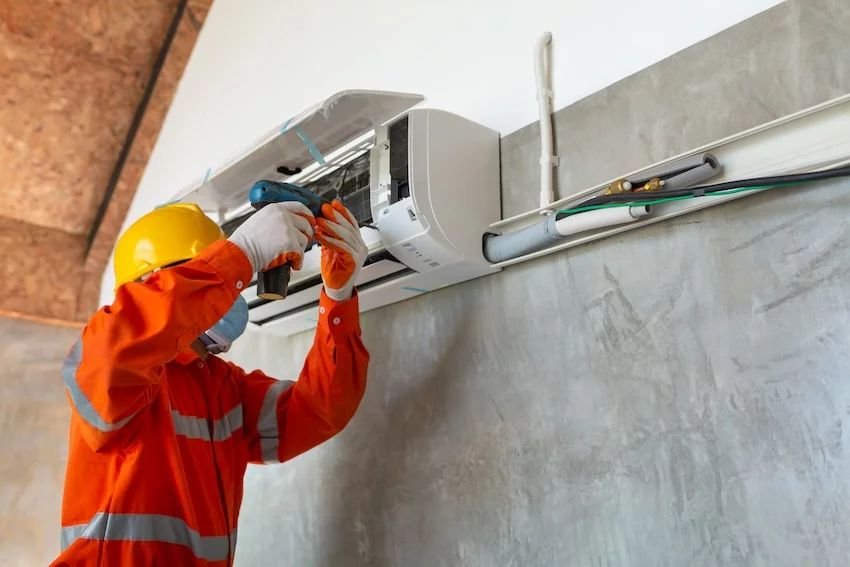
Step 4: Straighten the Evaporator and Condenser Fins
Open the unit fully and examine the coils. You’ll see vertical rows of thin metal blades — those are the fins.
These fins are delicate. They are easily bent by impact, vibration, or even high-pressure spraying. When bent, they obstruct airflow through the coils, which adversely affects cooling performance significantly.
How to Fix Bent Fins
Use a fin comb — an inexpensive tool that costs only a few dollars. Gently slide it over the fins to pop them back into place.
Work slowly and carefully. The fins are sharp. Protect your fingers by wearing gloves.
Proper fin straightening can significantly enhance the heat transfer efficiency of your unit. It’s one of those 10-minute steps that makes a real difference.
Step 5: Clean the Evaporator Coils (The Inside Coils)
The evaporator coils lie on the indoor-facing side of the unit. Warm air from your room passes over cold refrigerant to release heat so that cooled air can blow back in.
Over time, these coils can become coated in dust, dirt, and even mold. When they are covered, heat transfer decreases. The unit has to run longer to do the same job.
Cleaning the Coils
- Using a soft brush or the brush attachment on your vacuum, remove loose debris.
- Spray a no-rinse coil cleaner (available at hardware stores) straight onto the coils.
- Allow the cleaner to foam up and work for 5–10 minutes.
- The cleaner drips into the drain pan below, carrying the dirt with it.
- Use a damp cloth to wipe off any remaining residue.
Do not use a pressure washer or high-pressure hose on the coils. This could cause fins to flatten and coils to become permanently damaged.
If you notice a musty odor coming from your AC, the culprit is almost always dirty or moldy evaporator coils.
💡 Pro Tip: For a deeper dive into coil care and long-term unit health, visit Window AC Maintenance — a dedicated resource for keeping your cooling system in peak condition year-round.
Step 6: Clean the Condenser Coils (The Outside Coils)
The outdoor-facing side of the unit contains the condenser coils. Their job is to expel the heat taken from your room to the outside.
Because they face outside, they collect much more debris — leaves, cottonwood, insects, dust, and grime from pollution or construction.
How to Clean Them
- Carefully pull the unit out of the window, or get a helper to do so.
- Use a vacuum with a brush attachment to remove surface debris.
- Apply coil cleaner by spraying and waiting.
- Gently rinse with a garden hose on the low-pressure setting — spray from inside out to push debris away.
- Allow the coils to dry before putting the unit back.
Cleaning them at least once per year helps your unit expel heat more easily and stay cooler overall.
Step 7: Inspect and Clean the Drain Pan and Drain Hole
Window ACs remove humidity from the air as they cool. That moisture accumulates in a drain pan at the bottom of the unit. From there, it is meant to drain out through a tiny hole to the outside.
If the drain pan or drain hole becomes clogged, water backs up inside the unit. You will see it dripping inside your room, which can be both irritating and damaging to your walls and furniture.
What to Do
- Find the drain pan — typically at the bottom of the unit.
- Soak up any standing water with a cloth or small sponge.
- Mix a solution of equal parts water and white vinegar.
- Pour it into the pan to kill mold, mildew, and algae.
- If the drain hole is clogged, clear it with a thin wire or pipe cleaner.
- Wipe the pan dry with a clean cloth.
If heavily used, do this check every month. A clear drain line ensures your home stays dry and prevents mold from growing inside the unit.
Step 8: Check the Weatherstripping and Window Seal
This is one step most people completely skip.
A window AC unit sits in a window frame, and most units come with foam weatherstripping to seal the gaps around them. That foam compresses, tears, or simply falls off over time.
When the seal is weak, warm outside air seeps into your space. Your AC works around the clock to combat that heat. Your electricity bill climbs. And your room never fully reaches the temperature you want.
How to Check the Seal
- Examine all four edges where the unit meets the window frame.
- Gently press on the foam strips. If they don’t spring back, they’ve lost their effectiveness.
- Look for gaps where light passes through.
How to Fix It
- Replace old foam with new adhesive-backed foam tape weatherstripping, available at any hardware store.
- Cut it to size and press firmly into place.
- For gaps in the accordion-style side panels, use foam backer rod or AC foam tape to fill them in.
A tight, properly-sealed installation makes a world of difference in cooling efficiency. According to the U.S. Department of Energy, sealing and insulating around cooling equipment is one of the most cost-effective ways to improve home energy efficiency. Some homeowners say this one fix makes a considerable difference in room temperature.
Step 9: Verify the Electrical Connections and Run a Performance Test
After cleaning and reassembly, check the electrical side and test the unit.
Electrical Check
- Look at the power cord. Check for fraying, cracking, or any visible damage.
- Look at the plug prongs. They should be straight and clean, not burnt or corroded.
- If the cord or outlet shows any damage, do not plug the unit in. Have it inspected or replaced by a professional.
Run a Performance Test
Plug the unit in and switch it on. Here’s what to check:
| What to Watch For | What It Should Do |
|---|---|
| Airflow from vents | Strong, steady flow of cool air |
| Noise level | Smooth hum, no rattling or grinding |
| Temperature drop | Room should feel cooler within 10–15 minutes |
| Drain behavior | Water should drip outside, not inside |
| Thermostat response | Unit should cycle on/off at set temperature |
If something seems off — unusual noise, weak airflow, or ice forming on the coils — it may indicate a refrigerant issue or a mechanical problem that requires a professional.
Seasonal Maintenance: What to Do Year-Round
Cleaning isn’t just a one-time activity. If you take care of your unit, it will run well for years.
| Season | Task |
|---|---|
| Spring (before first use) | Full cleaning, inspect seals and cord |
| Summer (monthly) | Clean or rinse filter, check drain pan |
| Fall (end of season) | Deep clean all components before storage |
| Winter (during storage) | Cover unit or remove it and store in a dry place |
Common Window AC Problems and What They Usually Mean
| Problem | Likely Cause | Fix |
|---|---|---|
| Weak airflow | Clogged filter or bent fins | Clean filter; straighten fins |
| Warm air blowing | Dirty coils or low refrigerant | Clean coils; call a pro if it continues |
| Water dripping inside | Clogged drain hole | Clear the drain hole |
| Musty or moldy smell | Dirty evaporator coils or drain pan | Clean with vinegar |
| Loud rattling noise | Loose screws or debris in fan | Tighten screws; check for debris |
| Ice forming on coils | Low airflow or refrigerant problem | Clean filter; call a pro if it continues |
| Unit won’t power on | Electrical issue or tripped breaker | Check cord, outlet, and breaker |
How Long Does a Window AC Last?
A well-maintained window AC unit typically lasts 8 to 12 years. Some can last much longer with regular care.
Units that are neglected often fail within 5 to 6 years — sometimes sooner. The cost difference between regular maintenance and early replacement is substantial.
Spending just 30 minutes each month on basic upkeep can easily extend the life of your unit by years — saving you hundreds in energy costs and repair bills.
FAQs About Window AC Cleaning & Maintenance
Q: How often should I perform a full window AC cleaning? A complete deep clean — coils, drain pan, and fins — should be done at least once a year. Ideally, do it at the beginning of cooling season and again at the end before storage.
Q: Should I use bleach to clean my AC unit? Never use bleach on metal parts since it may corrode them. Use a diluted solution of white vinegar for mold and mildew. For coils, use dedicated coil cleaners.
Q: Can I clean my AC safely myself, or do I need to call a professional? Most of the steps in this guide are safe for homeowners to perform on their own. The only exception is anything involving refrigerant — that should be handled by a certified HVAC technician.
Q: My AC still smells musty even after cleaning. Why? If the smell remains after cleaning the filter and drain pan, chances are mold has formed on the evaporator coils. Apply a no-rinse coil cleaner made specifically for this purpose.
Q: Should I remove my window AC in winter? In cold-weather climates, it is usually better to remove the unit and store it. If removal isn’t possible, cover the outdoor-facing side with an AC cover to prevent weather damage.
Q: Can a dirty AC make you ill? Yes. A dirty AC will circulate dust, mold spores, and allergens throughout your room. Keeping up with cleaning also helps preserve indoor air quality.
Q: What’s the most important maintenance step? Cleaning the air filter regularly is one of the most impactful things you can do. It has a direct impact on airflow, efficiency, and air quality.
Wrapping It All Up
A window AC unit isn’t all that complicated. But it does need attention.
The 9 steps in this window AC cleaning & maintenance guide cover everything from the filter to the fins, the coils to the drain pan, and the weatherstripping to the electrical check. Individually, each step is doable. Together, they add up to a unit that runs cooler, costs less to operate, and lasts significantly longer.
None of this requires a service call for most of it. You don’t need expensive equipment. You only need a short time and the willingness to take real action.
Start with the filter today. Work through the rest over the weekend. Your room will feel the difference almost immediately — and your electricity bill will thank you by the end of the month.