Meta Description: Window AC cleaning & maintenance guide: Discover 7 powerful solutions to silence noisy units, boost efficiency, and extend your air conditioner’s lifespan today.
SUREFIRE 7 Window Air Conditioner Cleaning & Maintenance Guide for Noisy Units
Is your window air conditioner keeping you awake at night with weird rattling, buzzing, or banging noises? You’re not alone. Millions of homeowners contend with rattling AC units each summer — and, in most cases, the solution is simpler than you think.
A good, clean window AC operates quietly, cools well, and lasts for years. A neglected one? It becomes a noise factory that jacks up your energy costs and fails you at the worst possible moment.
In this window AC cleaning & maintenance guide, we will take you through 7 proven solutions that take the bull by the horns when it comes to noise problems. No technical background needed. Just step through the unit, grab a few simple tools, and get that thing running smooth and silent again.
Why Your Window AC Gets Loud in the First Place
It can be helpful to know the cause of the racket before jumping into fixes.
There are many reasons window AC units make noise. Yet dirt and debris are the most likely suspects. When dust clogs the filter or the coils, the motor must work harder — and that additional strain produces sound.
Loose parts are also a big problem. Over time, your machine can vibrate attachments such as screws, panels, and mounting brackets loose. A single loose screw can rattle the whole unit awake.
Other causes include:
- Bent or dirty fan blades
- Low refrigerant levels
- Worn-out motor bearings
- Ice buildup on the coils
- Bad installation or window fit not tight enough
The good news? Most of those issues can be fully avoided with regular cleaning and maintenance.
What You Should Have Before Getting Started
Getting your tools ready saves time and keeps things safe.
| Tool / Supply | Purpose |
|---|---|
| Screwdriver (flat + Phillips) | Removing panels and screws |
| Soft brush or old toothbrush | Cleaning fins and coils |
| Vacuum with brush attachment | Picking the dust up |
| Fin comb | Straightening bent fins |
| Coil cleaner spray | Deep cleaning evaporator/condenser coils |
| Mild dish soap + warm water | Washing the filter and casing |
| Foam or rubber weather stripping | Sealing gaps in the window frame |
| Machine oil (non-detergent) | Lubricating the fan motor |
| Soft cloths or microfiber towels | Wiping surfaces dry |
Before doing any maintenance, always unplug your unit. Safety first — always.
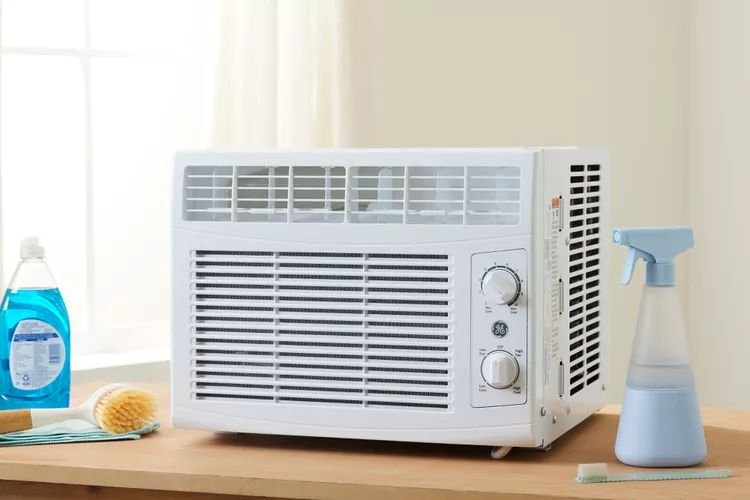
Solution 1: Clean or Change the Air Filter
This is the most effective thing you can do for a noisy AC.
A dirty filter blocks airflow. If air can’t move freely, the fan motor works harder to suck it through. That strain produces humming, rattling, and at times even a whistling sound.
Step-by-Step Guide to Filter Maintenance
Step 1: First and foremost, completely turn off and unplug the unit.
Step 2: Open the front panel or grille. Most of them have clips or tabs that click out and in easily.
Step 3: Slide out the filter. It often appears as a thin foam or mesh screen.
Step 4: Shine a light on it. If you can hardly see through it, then it’s time to clean — or change it.
Step 5: Rinse the filter under warm water. If it’s particularly grimy, add a splash of mild dish soap.
Step 6: Air dry completely — and never insert a wet filter again. Moisture inside the unit creates mold and damage.
Step 7: Insert it back in, close the panel, and plug the unit back in.
How Frequently Should the Filter Be Cleaned?
| Usage Level | Cleaning Frequency |
|---|---|
| Light use (a few hours/day) | Every 4–6 weeks |
| Moderate use (8+ hours/day) | Every 2–3 weeks |
| Heavy use or dusty environments | Every 1–2 weeks |
Replace your filter if it’s torn, warped, or no longer keeps its shape. Replacement filters are cheap and easy to find online or at hardware stores.
Solution 2: Straighten and Clean the Fins
Bent fins are a sneaky source of noise that hardly anyone thinks about.
The fins are the metal slats on the front and back of your AC unit. They are meant to enable airflow over the coils. When they get bent or clogged with dirt, airflow is uneven — and that creates noise and diminishes cooling power.
Spotting Bent or Dirty Fins
Examine both the front (evaporator) and back (condenser) sides of your unit. Healthy fins are straight, equally spaced, and free of debris. Bent fins look crushed or pushed together. Dirty fins show dirt, fuzz, or grime jammed between the slats.
How to Fix Bent Fins
Use a fin comb — an inexpensive tool designed for this purpose. It slides between the fins and repositions them. Work slowly and gently. These are thin, flexible fins that bend easily.
Cleaning the Fins
Start by picking up any loose dust — use a soft brush or vacuum brush attachment. Then spray a thin coat of coil cleaner in between the fins. Let it sit for a couple of minutes, then rinse off gently with water.
Pro tip: Avoid using a pressure washer or high-velocity water stream on the fins. High pressure bends them instantly.
Solution 3: Lubricate the Fan Motor
Any kind of squeal or grind you hear from your AC almost always indicates the problem is with the fan motor.
The bearings inside the motor dry out over time. Without lubrication, metal grinds on metal — and that’s where the awful screeching comes from.
How to Lubricate the Motor
Step 1: Unplug the unit and take off the outer casing (typically by unscrewing screws on the back and sides).
Step 2: Locate the fan motor. It is the cylinder that blades are attached to.
Step 3: Check for oil ports — small rubber-sealed holes on either end of the motor shaft. Not all motors have them. If yours doesn’t, the bearings are sealed and lubrication is not possible without putting a new motor in.
Step 4: Place 2–3 drops of non-detergent machine oil (SAE 10 or SAE 20) in each port. Don’t over-oil. Too much brings its own problems.
Step 5: Manually spin the fan blade a couple of times to distribute the oil.
Step 6: Put the unit back together, plug it in, and give it a test.
If the squealing persists after lubrication, the motor bearings may be beyond help. At that stage, replacing the motor or getting a new unit may be the wiser choice.
Solution 4: Tighten Loose Screws and Panels
This is the easiest fix of all, most times.
Vibration from the compressor and fan slowly works screws, panels, and plastic parts loose. One loose panel can make a ridiculously irritating rattle that sounds like some expensive trouble — when in fact it’s a 2-minute fix.
Where to Look for Loose Parts
- Front grille and panel clips
- Side panels and casing screws
- Fan blade mounting nut (on the motor shaft)
- Mounting bracket screws (where the unit sits in your window)
- Internal partition panel between evaporator and condenser sections
Get out a screwdriver and tighten every screw you can find. Don’t overtighten — just snug is fine.
Dealing with Vibrating Plastic Panels
It may sometimes be the plastic itself that vibrates rather than loose screws. In this case, place a thin piece of foam tape between the panel and the metal frame. This helps dampen the vibration and eliminate the rattle.
Solution 5: Deep Clean the Evaporator and Condenser Coils
This is the one maintenance step that most folks skip — and it’s one of the leading reasons AC units get loud and less efficient.
The evaporator coil (inside, facing your room) absorbs heat. The condenser coil (outside, facing the street) expels that heat. Dirt, dust, and grime collect on both coils over time. When they are coated with buildup, the system has to work harder to transfer heat — and that added workload generates noise and wastes electricity.
Signs Your Coils Need Cleaning
- Less cooling even though the AC runs constantly
- Frost on the coils or refrigerant lines
- Higher-than-usual electricity bills
- Musty odor coming from the unit
- Increased humming or straining sounds
Step-by-Step Coil Cleaning
Step 1: Disconnect the unit and take it out of the window if you can. It is cleaner and easier to work outside.
Step 2: Take off the casing to expose both sets of coils.
Step 3: Vacuum both coils using a brush attachment to remove loose dust.
Step 4: Spray the coil surface with a foaming coil cleaner evenly. Follow the product instructions — most have a 5–10 minute dwell time.
Step 5: The foam will work to dissolve the grime. Lightly rinse with water, or if using a no-rinse formula, let it drip into the drain pan.
Step 6: Clean out the drain pan as well. This is the little tray at the bottom that catches condensation. A clogged drain pan results in water overflow and mold.
Step 7: Let everything dry completely, then reassemble.
Coil Cleaning Frequency Chart
| Environment | Recommended Frequency |
|---|---|
| Clean suburban home | Once a year (spring) |
| Urban/dusty area | Twice a year |
| Near construction or high pollen | Every 3–4 months |
| Homes with pets | Every 2–3 months |
Solution 6: Fix the Window Seal and Mounting
Believe it or not, a poorly sealed window frame is one of the most neglected noise sources.
The unit shakes against the window frame or wall when your window AC isn’t fitted tightly. Air leaks around the sides cause whistling sounds. The loose fit gets even worse on windy days.
Check Your Current Setup
Look at where the AC meets the window frame. Are there gaps? Does the unit wobble when you push it? Are the side accordion panels stretched all the way out and sealed properly?
How to Fix a Loose or Leaky Window Fit
Step 1: Ensure the mounting bracket (if your unit has one) is securely attached and level.
Step 2: Verify that the side accordion panels are completely expanded and lie flush against the window frame.
Step 3: Apply foam weather stripping tape along the edges where the unit meets the window sill, side panels, and any visible gaps. It’s inexpensive, super easy to apply, and makes a huge difference.
Step 4: If the unit rocks or moves, place rubber anti-vibration pads under it. These help absorb vibration and keep the unit in place.
Step 5: Close and latch the window firmly down onto the unit’s top rail. This locks everything in place.
A well-sealed unit operates more quietly — and it cools better because it’s not fighting warm air seeping in from outside.
Solution 7: Defrost Ice Buildup on the Coils
It’s more common than people think for ice to form on your AC coils — and it makes some pretty alarming noises when it does.
Sometimes the fan blade clips or scrapes the ice forming on the evaporator coil. That creates a loud banging, clicking, or scraping noise that sounds like something is severely broken.
Why Ice Forms on AC Coils
- Dirty air filter blocking airflow
- Thermostat set too low for outdoor temperatures
- Low refrigerant levels
- Running the AC in cool weather (below 60°F outside)
- Dirty evaporator coils
How to Defrost Your AC Safely
Step 1: Immediately switch off the unit. Running a frozen AC causes compressor damage.
Step 2: Switch the setting to “Fan Only” mode if available. The fan circulates warm air over the coils and speeds up the defrost process.
Step 3: Lay towels around and underneath the unit to absorb dripping water.
Step 4: Allow 2–4 hours for the ice to melt completely. Don’t start chipping the ice off — you’ll ruin the fins and coils.
Step 5: After defrosting, identify and fix the underlying cause (generally a dirty filter or low refrigerant) before turning cooling mode back on.
Note: If your unit freezes up repeatedly even after cleaning, low refrigerant is likely the cause. Refrigerant issues require a licensed HVAC technician — not a do-it-yourself fix.

Annual Maintenance Schedule: Keep Your AC Running All Season
Most noise problems are prevented before they start by staying on a schedule.
| Time of Year | Maintenance Task |
|---|---|
| Early Spring (before first use) | Deep clean filter, coils, fins, drain pan. Check seals. |
| Monthly (during heavy use) | Clean or rinse filter. Check for unusual sounds. |
| Mid-Summer | Inspect fins for damage. Check window seal. Lubricate motor if needed. |
| End of Season | Full cleaning. Cover the unit or remove and store indoors. |
| Before Storage | Clean thoroughly. Let dry completely before covering. |
Following that simple schedule can add years to your AC and keep noise problems at bay.
Common Window AC Sounds and What They Mean
| Noise Type | Likely Cause | Solution |
|---|---|---|
| Rattling | Loose screws or panels | Tighten screws, add foam tape |
| Squealing / screeching | Dry fan motor bearings | Lubricate motor |
| Banging / clunking | Ice scraping fan blade, or loose fan | Defrost coils, tighten fan nut |
| Humming / buzzing | Dirty coils, strained motor | Clean coils and filter |
| Whistling | Air leaks around window seal | Seal gaps with weather stripping |
| Clicking at startup | Normal relay click — usually fine | No action needed |
| Dripping or gurgling | Condensation drain clog | Clean drain pan and drain line |
FAQs: Window AC Cleaning & Maintenance
How often do I need to clean my window AC?
Clean the filter every 2–4 weeks during heavy use. Ideally, give it a full deep clean — coils, fins, drain pan, and casing — at least once a year, early enough in spring before the cooling season begins.
Is using a household cleaner on my AC coils okay?
A cleaner designed specifically for AC coils is the better way to go. Conventional cleaners can leave residue, destroy aluminum fins, or corrode metal parts. Coil cleaner sprays are inexpensive and safe for these surfaces.
What kind of sound is normal for a window AC?
Yes. All AC units make some noise — a low hum from the compressor and fan is completely normal. What is not normal is rattling, banging, squealing, or sudden changes in sound level. Those are cues that something needs addressing.
My AC is leaking water inside. Is that related to noise?
Often, yes. A clogged drain pan or drain line causes water to back up. That water can hit the fan blade and make a sloshing or gurgling sound. It can also lead to ice buildup if the drain is fully blocked. Make cleaning the drain pan part of your regular maintenance routine.
How do I know if my AC needs refrigerant?
Signs include: the unit runs constantly but barely cools the room, ice forms regularly on the coils, or you hear a hissing sound near the refrigerant lines. Refrigerant must be handled by a certified technician — don’t try this at home.
Can I clean my window AC without removing it completely?
You can perform basic maintenance — filter cleaning, fin straightening, sealing — without having to completely remove the unit. However, for a thorough coil cleaning and motor lubrication, taking out the unit makes the job easier and more effective.
How long does a window AC last with proper maintenance?
A well-maintained window AC can usually last 10–15 years. Neglected units are likely to fail within 5–7 years. The most important thing you can do to prolong the life of your unit is clean it regularly.
Wrapping It All Up
A loud window AC isn’t something you just have to live with. In many cases, the solution is inexpensive, within your DIY capabilities, and something you can tackle in an afternoon.
This window AC cleaning & maintenance guide covered seven of the best solutions — everything from cleaning the filter and straightening fins to lubricating the motor, sealing the window frame, and defrosting frozen coils. Each fix targets a specific noise type and works toward the source of the problem instead of just masking it.
The key takeaway? Don’t wait until your AC stops working or starts making a horrible sound. Establish a simple routine maintenance schedule, stick to it, and your unit will reward you with years of trouble-free cooling.
But first, tackle the simplest fix: clean that filter. One simple step can make more of a difference than you may even realize.