Here is your fully formatted article with the two links embedded:
Meta Description: Window AC cleaning & maintenance guide tips that every homeowner must know — follow these 7 simple tricks for better air flow, to slash energy bills and keep your home smelling fresh all season.
7 Tricks to Ensure Your Home Has Fresh Air: Window AC Cleaning & Maintenance Guide
There’s nothing worse than turning on your window AC and being blasted with stale, musty air.
If your unit isn’t blowing as cold as it once did — or smells like a wet sock — don’t panic. You don’t have to call in a technician or purchase a new unit. All you need is a good window AC cleaning & maintenance guide to get you through.
In this article, we will guide you through 7 easy and beginner-friendly hacks to clean your window AC from top to bottom. No fancy tools. No confusing steps. Just nice, cool, fresh air — the way it should be.
Whether your AC has been sitting idle all winter or blasting 24/7, these tips will revive it.
Let’s dive in.
Why Cleaning Your Window AC Is Actually Important
Most people overlook their AC unit until it stops working. That’s a mistake.
A clogged AC doesn’t just blow hot air. It also:
- Uses more electricity than a clean unit
- Disperses dust, mold, and allergens throughout your room
- Breaks down sooner and is more expensive to maintain
- Makes strange noises that worsen with time
According to the U.S. Department of Energy, a clogged or dirty air filter can decrease your AC’s efficiency by as much as 15 percent. That means the price of your electricity spikes while the comfort of your home dips.
Cleaning your window AC every 1–2 months during heavy use can save you money, improve air quality, and extend the life of your unit by many years.
That’s a mighty reward for a little effort.
Things You’ll Need Before Starting
Before diving into any cleaning, gather these basic supplies:
| Tool / Supply | Purpose |
|---|---|
| Screwdriver (flathead + Phillips) | Remove front panel and grille |
| Soft brush or old toothbrush | Gently scrub fins and coils |
| Vacuum with brush attachment | Remove loose dust and debris |
| Mild dish soap | Clean filter and plastic panels |
| Warm water | Rinse and wash removable parts |
| Fin comb (optional) | Straighten bent aluminum fins |
| Spray bottle | Apply cleaning solution evenly |
| Coil cleaner spray (optional) | Deep clean evaporator coils |
| Microfiber cloth | Wipe down surfaces without scratching |
| Gloves | Protect hands during cleaning |
Many of these items are already in the home. The fin comb and coil cleaner are handy but not essential for a deep clean.
Safety First — Before You Touch Anything
This step is non-negotiable.
Always unplug your window AC before cleaning.
Don’t attempt to clean a unit that’s still plugged in. The unit can still conduct electric current, even when it’s powered down. Water and electricity are a dangerous combination.
Also:
- Unplug the unit and let it sit for 15–30 minutes before you begin
- Make sure the area is well-lit so you can see what you’re doing
- Use gloves if you have a sensitivity to dust or mold
- If you notice signs of mold growing inside the unit, a face mask might be appropriate as well
Once the unit has been safely unplugged and you have your supplies on hand, it’s game time.

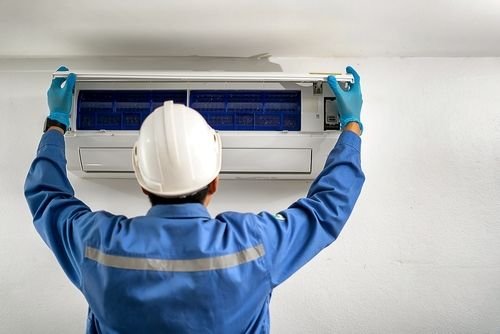
Trick #1 — Clean or Replace the Air Filter (Always Do This One First)
The most essential window AC part to keep clean is the air filter. It traps dust, pet hair, pollen, and other airborne debris before it can get into the unit.
When it becomes clogged, air can’t flow properly through. Your AC runs longer, consumes more energy, and cools less efficiently.
How to Clean the Filter
Step 1: Detach the front panel of the unit. They either snap off or have a couple of tiny screws.
Step 2: Slide out the filter. It’s typically a mesh screen in the shape of a rectangle.
Step 3: Place it against a source of light. If you can’t see light through it, it’s well overdue for a scrub.
Step 4: Bring it outside and tap it gently to knock off loose dust.
Step 5: Wash it under warm running water. Add a drop of dish soap and scrub gently with a soft brush.
Step 6: Rinse thoroughly and air dry completely before replacing it.
Never put a wet filter back into the unit. Dampness inside the AC causes mold to form — and that’s precisely what you want to eliminate.
When to Replace Rather Than Clean
If your filter is torn, warped, or still gray after washing, you need to replace it. Replacement filters for most window models run only $5–$15 and are widely available online or at hardware stores.
How often: Clean every 2–4 weeks during heavy use. Replace every 1–2 seasons.
Trick #2 — Vacuum the Evaporator and Condenser Coils
The coils are the metal fins inside the unit. There are two sets:
- Evaporator coils — inside the unit, facing the room
- Condenser coils — on the exterior, facing outward
Both collect dust over time. Dusty coils can’t absorb or release heat effectively, so your AC works longer to cool the same area.
How to Clean the Coils
Step 1: Use a soft brush attachment with your vacuum cleaner.
Step 2: Vacuum the fins gently from top to bottom. Do not push hard — the fins bend easily.
Step 3: For persistent buildup, lightly mist a no-rinse coil cleaner (found at hardware stores) and allow it to drip off on its own.
Step 4: If you don’t have coil cleaner, a light mist of soapy water works too. Just ensure the unit is entirely dry before plugging it back in.
What About Bent Fins?
Bent fins restrict airflow just like dust does. A fin comb can straighten them out with care. Slowly run the comb down the fins to realign them. It’s a straightforward fix that really impacts performance.
How often: Clean the coils once per season, or more often in dusty areas.
Trick #3 — Clean the Drain Pan and Drain Line
Your window AC removes moisture from the air during the cooling process. That moisture has to go somewhere — and it drains into a small tray known as the drain pan.
Over time, algae, mold, and gunk build up in the drain pan. If the drain line becomes blocked, water can back up and surge into your room or walls.
How to Clean the Drain Pan
Step 1: Find the drain pan — it’s typically at the bottom of the unit.
Step 2: Absorb any standing water with a cloth or small sponge.
Step 3: Rinse the pan with warm water and a little white vinegar or dish soap.
Step 4: Check the drain hole. It’s a tiny hole in the bottom of the pan. If blocked, push through with a toothpick or a thin wire.
Step 5: After cleaning, add a few drops of hydrogen peroxide to discourage future algae and mold growth.
Signs Your Drain Is Clogged
- Water leaking from the front of the unit (inside your room)
- Musty odor when the AC is running
- The unit freezing up more than usual
Catching a clogged drain early can save you from costly water damage repairs later.
How often: Once every 1–2 months during the cooling season.
Trick #4 — Wipe Down the Front Panel and Vents
This one is fast and easy — but it matters more than people think.
The front grille and vents are the very first components that air encounters as it makes its way into your room. Dust and grime that collects on the vents gets blown straight into your space.
How to Clean the Front Panel
Step 1: If the front grille is removable, take it off. Most snap off with gentle pressure.
Step 2: Soak it in warm soapy water for 10–15 minutes.
Step 3: Clean using a soft brush, particularly between the slats.
Step 4: Rinse and allow to dry fully.
Step 5: For vents that can’t be removed, clean between the slats with a damp microfiber cloth or a small brush.
Don’t Forget the Exterior
Weather beats up the outside of the unit — rain, leaves, and bird droppings can all back up into the rear panel.
When the unit is unplugged and taken out of the window (if applicable), spray the outside lightly with a garden hose. Never use a pressure washer — the force can bend fins or drive water into electrical components.
How often: Wipe down the panel monthly. Deep clean at the start and end of the cooling season.
Trick #5 — Align and Guard the Aluminum Fins
We mentioned this briefly in Trick #2, but it deserves a section of its own. Bent fins are one of the most overlooked reasons your AC might not be performing at its best.
The aluminum fins on your coils are thin and easy to bend — even by accident. When bent, they obstruct the airflow the unit needs to function correctly.
Why Fins Get Bent
- Rough cleaning with stiff brushes
- Pets or children pushing up against the unit
- Debris blowing in from outdoors
- Heavy rain or hail striking the outside coils
How to Fix Bent Fins
A fin comb is a great little tool purpose-built for this job. It has teeth of various sizes to accommodate the fin spacing on different AC models.
Step 1: Select the appropriate comb size for your unit (check your AC manual or examine the fin spacing).
Step 2: Insert the comb at the top of the bent section and slowly pull it downward.
Step 3: Work slowly and in a single direction to avoid bending the fins further out of shape.
You won’t get every fin perfectly straight, but even small improvements count.
How often: Inspect fins once per season. Fix bends as you spot them.
Trick #6 — Deep Clean the Interior Cabinet
Once a year — ideally at the beginning of the cooling season — it’s worth doing a full deep clean of the interior cabinet.
This is where mold, mildew, dead bugs, and years of dust can lurk. A dirty cabinet restricts airflow and may even become a health concern.
For more seasonal tips and step-by-step AC care routines, Window AC Maintenance is a great resource to bookmark alongside this guide.
Step-by-Step Interior Cabinet Clean
Step 1: Disconnect the unit and take it out of the window, if you can.
Step 2: Remove the front panel, filter, and any removable interior parts.
Step 3: Vacuum any loose debris from all interior surfaces.
Step 4: Fill a spray bottle with equal amounts of water and white vinegar. Spray the interior surfaces — avoiding electrical components and wiring.
Step 5: After 5 minutes, wipe it down with a microfiber cloth.
Step 6: For mold spots, dampen a cloth with a little undiluted white vinegar and scrub gently.
Step 7: Leave everything to air dry thoroughly — at least 24 hours — before reassembling and plugging in.
A Note on Mold
If you find considerable black or green mold inside the cabinet, take it seriously. Mold spores float in the air and can cause allergies, asthma, and other health issues.
Diluted bleach (1 tablespoon per gallon of water) works well on plastic and metal surfaces for heavy mold. Do not apply bleach near the motor or electrical components.
How often: Full interior clean once per season.
Trick #7 — Pack It Up Right at the End of the Season
How you store your window AC at summer’s end has a big impact on how it performs next year.
A unit that isn’t stored properly collects moisture, grows mold, and can even become a little pest haven over winter.
Guidelines for Properly Storing Your Window AC
Step 1: Completely clean the unit before storing it — filters, coils, drain pan, everything.
Step 2: Allow it to dry completely for at least 24 hours.
Step 3: Place the unit in a plastic bag or its original box to protect it from dust and moisture.
Step 4: Store upright in a cool, dry place — like a basement shelf or closet. Never keep it on its side, as oil from the compressor can seep into the wrong places.
Step 5: Add a small packet of silica gel into the wrapping to absorb any residual moisture.
What If You Leave It in the Window Year-Round?
If you can’t take the unit out, get a window AC cover (for indoors or outdoors). These protect the unit while keeping drafts, moisture, and debris out during the off-season. They usually cost around $10–$25 and are worth every penny.
Maintenance Schedule at a Glance
Here’s a basic chart to refer to throughout the year:
| Task | Frequency |
|---|---|
| Clean/rinse air filter | Every 2–4 weeks (heavy use) |
| Vacuum coils | Once a month |
| Clean drain pan | Every 1–2 months |
| Wipe front panel and vents | Once a month |
| Check and straighten fins | Spring and Fall |
| Deep clean interior cabinet | Beginning/end of season |
| Proper seasonal storage | End of cooling season |
Print it out and tape it somewhere near your AC unit as a reminder.
How to Tell Your Window AC Needs More Than Just Cleaning
Sometimes cleaning isn’t enough. Here are warning signs that point to needing professional help — or a replacement:
- Ice on the coils — Possibly a refrigerant issue, not just dirt
- Loud grinding or rattling noises — Could indicate a worn motor or loose fan blade
- AC not turning on — Possible electrical or compressor issue
- Refrigerant odor — A chemical or sweet smell could indicate a refrigerant leak
- Always running but never cooling — Can indicate a failing compressor
If you notice any of these, cease use immediately and call a licensed HVAC technician. Do not try to make refrigerant repairs yourself — that work requires special certification and equipment.
Frequently Asked Questions About Window AC Cleaning & Maintenance
Q: How frequently should I clean my window AC overall? A: Rinse the filter every 2–4 weeks if you are using it heavily. Perform a complete cleaning at the beginning and end of the cooling season.
Q: Can I wash the outside of my AC with a pressure washer? A: No. Pressure washers can bend the fins and drive water into electrical components. Use a regular garden hose set to a gentle setting instead.
Q: What is the best thing to use to clean AC coils? A: A no-rinse foaming coil cleaner from a hardware store works great. A light mist of soapy water can also help, though it needs to dry completely before use.
Q: My AC smells musty. What’s causing it? A: Musty smells typically result from mold or mildew growing in the drain pan, filter, or interior cabinet. Clean those areas with a vinegar solution and let everything dry completely.
Q: Is it safe to clean the AC myself, or do I need a service technician? A: Basic cleaning — filter, coils, drain pan, and vents — is perfectly safe to do yourself as long as the unit is unplugged. For refrigerant issues, electrical problems, or major breakdowns, call a professional.
Q: Can a dirty AC make you sick? A: Yes. A filthy AC can blow mold spores, bacteria, and allergens into your space. That can lead to allergies, asthma attacks, and respiratory infections — particularly in children and the elderly.
Q: How do I know when my AC filter needs replacing versus just cleaning? A: If the filter is torn, warped, or still looks dirty after rinsing, replace it. Most filters cost under $15 and should be replaced every 1–2 seasons.
Q: What happens if I never clean my window AC? A: The unit becomes less efficient, uses more electricity, produces poor air quality, and breaks down sooner than it should. Regular maintenance can easily extend a unit’s life by 3–5 years.
Wrapping It All Up
Your window AC works hard to keep your home comfortable. The very least you can do is show it some love in return.
This window AC cleaning & maintenance guide runs the gamut from the very basic — washing the filter, for instance — to more involved seasonal chores like cleaning the coils and storing the unit properly. None of these steps require special skills or expensive tools. Just a little time and consistency.
The payoff? Lower electricity bills, cleaner air, fewer repairs, and an AC that lasts for years rather than failing on a hot mid-summer day.
Start with Trick #1 today. Clean that filter. You will see the difference very quickly.
And keep in mind — a clean AC isn’t all about cooling. It’s about breathing better, living healthier, and getting the most out of the machine you already own.
Bookmark this guide and refer back to it at the beginning of every cooling season. Your lungs — and your wallet — will appreciate it.