Meta Description: Window AC cleaning & maintenance doesn’t have to feel like such a chore. Here are 5 simple, effective hacks that keep your unit cool, clean and efficient all season long.
5 Smart Window AC Cleaning & Maintenance Guide Hacks That Actually Work
Your window AC unit is working hard every day. It draws hot air in, cools it and sends the cooled air back out into your room — repeatedly. But most people neglect to take care of it until something breaks down.
An unkempt, dirty AC is not just odorous. It works more, costs more to operate and wears out sooner. The good news? You don’t have to be a techie to maintain it in good condition.
Here’s a guide of smart, practical window AC cleaning and maintenance hacks that actually work. These aren’t hazy snippets of advice — they’re definitive processes that anyone can put into action, even if you have no tech experience.
Let’s get into it.
Why Regular Window AC Maintenance Is More Critical Than You Think
Before diving into the hacks, it’s helpful to know what’s at stake.
A window AC unit has different components that get covered with dust, mold, and debris over time. If those components become clogged or dirty, the unit must run on greater electricity to do the same task. That equates to higher bills and additional wear on the motor and parts.
Here’s a quick glimpse at what neglect actually costs you:
| Bad Maintenance Leads To | Result |
|---|---|
| Clogged air filter | Less airflow and energy increase |
| Dirty evaporator coils | Low cooling performance |
| Blocked condenser coils | Overheating and unit failure |
| Mold in drain pan | Awful smell and bad air |
| Bent fins | Restricted airflow and loud operation |
Research from the U.S. Department of Energy indicates that merely having a dirty filter can raise energy usage by 5–15%. That quickly adds up through a hot summer.
Regular cleaning and maintenance of your window AC keeps your unit up and running efficiently. It also adds years to its lifespan.
What You’ll Need Before Getting Started
You don’t need fancy equipment. So much of what you need is likely already at home.
Basic supplies:
- Screwdriver (flathead and Phillips)
- Soft brush or old toothbrush
- Vacuum cleaner with brush attachment
- Mild dish soap or coil cleaner spray
- Warm water
- Spray bottle
- Microfiber cloths
- Fin comb (optional but helpful)
- Hydrogen peroxide or white vinegar (for mold)
- Gloves and a face mask
Once you have these things, you’re good to go. Always disconnect the unit before beginning any cleaning or maintenance activities. Safety first, always.
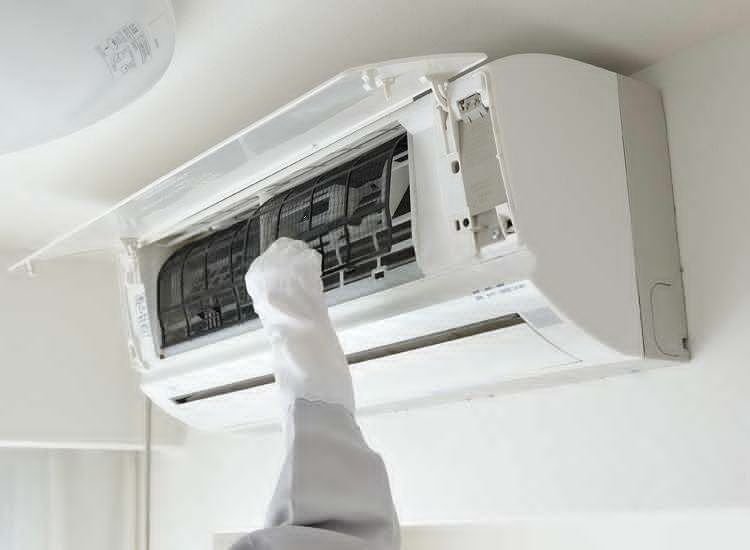
Hack #1 — The Deep Filter Clean That Everyone Misses
The window AC air filter is your first line of defence. It traps dust, pet hair, pollen and other particles before those contaminants get into the system.
Most people forget to clean it, or just rinse it quickly. That’s not enough.
How to Properly Deep Clean Your Filter
Step 1: Switch off your AC unit and remove plug.
Step 2: Open the front panel. Most window units feature a plastic panel that either snaps off or slides out. If you’re not sure, check your user manual.
Step 3: Gently slide out the filter. Do not shake it indoors — take it outdoors or over a garbage bag.
Step 4: Bang the filter against a hard surface to dislodge loose dust.
Step 5: Using the brush attachment, vacuum both sides of the filter. Move slowly and cover the entire surface.
Step 6: Submerge it in warm water with a few drops of dish soap in a sink or basin. Cover the filter and soak for 10–15 minutes.
Step 7: Using a soft brush, scrub off the muck. Be careful not to scrub too hard because you don’t want to tear the mesh.
Step 8: Rinse well under running water until the rinse runs clear.
Step 9: Shake off any excess water and allow to air dry completely — minimum of 1–2 hours. Always dry a filter completely before replacing it in the unit.
Step 10: Put the filter back in and close the panel.
How Often Should You Clean the Filter?
| Usage Level | Cleaning Frequency |
|---|---|
| Light use (occasional) | Every 4–6 weeks |
| Moderate use (daily) | Every 2–3 weeks |
| Heavy use (all day, pets in home) | Every 1–2 weeks |
Just taking this one step can increase cooling efficiency by as much as 15%. This earns you the easiest victory in window AC care.
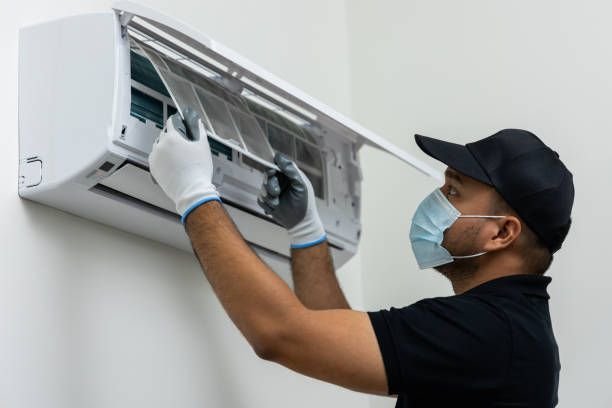
Hack #2 — The Proper Way To Clean Coils (Most Guides Have This Wrong)
Your AC unit contains two sets of coils — the evaporator coils (on the inside, facing indoors) and the condenser coils (outside, facing outside). Both are dirt and debris collectors, but in different ways.
Dirty coils can’t transfer heat efficiently. This causes the entire system to work harder and cool less efficiently.
Cleaning the Evaporator Coils (Indoor Side)
These are behind the filter. They’re usually visible once you take off the filter — they resemble thin, wavy metal fins.
Step 1: Remove loose dust with a soft brush or vacuum cleaner with brush attachment.
Step 2: Spray a no-rinse evaporator coil cleaner (sold at hardware stores) directly onto the coils. This type of cleaner foams up, lifts dirt and drips into the drain pan by itself.
Step 3: Allow the foam to do its thing — typically 5 to 10 minutes.
Step 4: You do not need to rinse. The residue will be flushed into the drain pan due to condensation from normal AC operation.
Cleaning the Condenser Coils (Outdoor Side)
These are located on the outside and trap dirt, leaves and debris from your surroundings.
Step 1: If you can, gently take the outer casing off. That typically requires removing a few screws.
Step 2: Use a soft brush to clear debris from the fins.
Step 3: Spray with condenser coil cleaner or gently rinse the coils with a hose (if the unit is fully outside). Use an inside-out spray pattern to drive debris out.
Step 4: Allow to dry then reassemble.
Pro Tip: Never use a high-pressure washer on the coils. The fins are super fragile and bend easily. You just need a gentle rinse or foam cleaner.
Quick Coil Maintenance Comparison
| Coil Type | Location | Primary Dirt Source | Cleaner Type |
|---|---|---|---|
| Evaporator | Indoor side | Dust, mold, moisture | No-rinse foam spray |
| Condenser | Outdoor side | Dirt, leaves, debris | Hose rinse or spray |
Clean coils make a huge difference. This is hands down one of the most significant steps in any window AC cleaning and maintenance routine.
Hack #3 — The Check No One Talks About: Drain Pan & Drainage
Here’s something that most guides don’t mention at all — the drain pan.
Your AC removes the humidity in your space. That moisture collects as water and drains into a pan and out of the unit. When this system becomes obstructed or filthy, water backs up, mold builds up, and you start getting that stale odor coming from your AC.
Step-by-Step Drain Pan Cleaning
Step 1: Open the outer case and find the drain pan. It is underneath the evaporator coils and captures condensation.
Step 2: Check for standing water. If there is a lot of water pooling in the pan, your drain hole may be clogged.
Step 3: Absorb and remove the water with a wet-dry vacuum or old cloth.
Step 4: Combine equal parts of white vinegar and warm water in a spray bottle. Spray the entire pan generously.
Step 5: Allow to sit for 5–10 minutes. Vinegar eliminates mold and dissolves mineral deposits.
Step 6: Clean the pan using an old toothbrush. Be sure to focus on the corners and drain hole area.
Step 7: Rinse and dry with a cloth.
Step 8: Check the drain hole. Use a thin wire, pipe cleaner, or toothpick to clear the way.
How to Prevent Mold From Growing in the Drain Pan
After cleaning, you can add a drain pan tablet (sold at HVAC supply stores). These slow-dissolve tablets help prevent algae and mold from forming between cleanings.
Or, each month during high-use seasons, pour some diluted bleach (1 tablespoon per cup of water) into the drain hole.
Signs Your Drain Pan Needs Service
- Musty or moldy smell from the AC
- Water dripping inside the room
- Black or green growth visible inside the unit
- The unit feels more humid than usual
Don’t ignore this step. A clean drain system is crucial to healthy indoor air — and it’s an important component of smart window AC maintenance. For more expert tips on keeping your unit in top shape, visit Window AC Maintenance, a dedicated resource for AC care guides and seasonal advice.
Hack #4 — Straighten Fins for Better Airflow (A 10-Minute Fix)
Most people are surprised by it, but this hack actually works.
The delicate metal fins on your coils can become bent over time — from bumps, cleaning pressure or just normal use. Bent fins restrict airflow, which hurts efficiency and places additional burden on the compressor.
It takes under 10 minutes, and costs next to nothing, to straighten them.
What Is a Fin Comb?
A fin comb is a small plastic or metal tool with teeth meant to slide between the fins to straighten them. You can pick one up at a hardware store for a few bucks.
They have different spacing between the teeth for a variety of fin densities. Before purchasing, check the fins on your AC and make sure the comb size matches.
How to Straighten AC Fins
Step 1: Make sure the unit is unplugged and cooled down.
Step 2: Inspect the fins in good lighting. You will be able to see the bent sections — they will look crushed or misaligned.
Step 3: Find a bent part and carefully place the fin comb into the fins at the edge.
Step 4: Slowly draw the comb in the direction the fins run. Don’t force it.
Step 5: Work in smaller sections. Repeat until the fins are aligned and evenly spaced.
Step 6: Lightly run your finger along the fins to make sure they’re even. Be cautious — fin edges may be sharp.
Warning: If more than 20–25% of your fins are severely bent or crushed, calling a technician may be worth it. But light bending is totally DIY-friendly.
Why This Matters
Straightened fins let air move freely over the coils. That directly increases heat exchange efficiency, leading to more effective cooling and less energy consumption.
It’s one of those window AC maintenance tips that don’t take much time but make a real difference.
Hack #5 — The Seasonal Shutdown & Storage Prep (Nobody Discusses This)
When summer is over, most people turn off their window AC and walk away. Big mistake.
How you winterize and store your unit impacts how it performs next season. Good seasonal prep keeps rust, mold and motor damage at bay during the off-season.
End-of-Season Shutdown Checklist
Step 1 — Run It in Fan-Only Mode Before you hibernate for the season, run it in fan-only mode for 30–60 minutes. That dries up any moisture that remains inside, particularly in the coils and drain pan. Moisture sitting all winter causes mold.
Step 2 — Do a Full Clean Go through Hacks 1–4 before storing. You want the unit clean going into storage, not when taking it out. Storing a dirty unit allows mold and rust to grow undisturbed for months.
Step 3 — Remove the Unit If You Can Remove your window AC before winter, if possible. Cold drafts can slip in around poorly sealed units left in windows. Taking it out also protects it from the elements.
Step 4 — Let It Dry Completely After you’ve cleaned everything, allow the unit to air dry for a minimum of 24 hours before storing or wrapping it.
Step 5 — Wrap and Store Properly Wrap the unit with breathable cloth, or use original packaging. No plastic bags — they hold in moisture and promote rust and mold.
Store in a dry, indoor area. Steer clear of damp basements or garages if you can.
Step 6 — If Leaving It in the Window If you don’t plan to remove the unit, use an AC window cover (inside and outside) to help prevent drafts and protect the unit from debris and moisture.
Spring Startup Checklist
When warm weather returns, don’t simply turn it on cold. Follow these steps:
| Step | Activity |
|---|---|
| 1 | Remove the covers and check for any pest nests or debris inside |
| 2 | Clean the filter before using for the first time |
| 3 | Inspect the power cord for any fraying or damage |
| 4 | Run in fan-only mode for about 15 minutes initially |
| 5 | Switch to cool mode and ensure proper airflow and operation |
This straightforward seasonal prep prolongs the life of your unit and makes sure it’s ready to run when you need it most.
Bonus Tip — Make Your AC Smell Fresh All Season
Nobody likes musty air blowing through their room. Here’s a simple trick.
After cleaning, spray the inside of the unit (avoid getting it on electrical components) with a 50/50 solution of white vinegar and water. Allow it to dry before operating the unit.
A few drops of tea tree essential oil placed on a cotton ball and set near the intake can also help neutralize odors naturally.
To keep it fresh, run the fan-only mode for a few minutes before cooling kicks in. This helps vent out any stale air lingering inside.
How Often to Do Each Task (Full Maintenance Schedule)
| Task | Frequency |
|---|---|
| Clean air filter | Every 1–4 weeks depending on use |
| Wipe exterior surfaces | Monthly |
| Clean evaporator coils | Once or twice per season |
| Clean condenser coils | Once per season |
| Check and clean drain pan | Monthly during heavy use |
| Straighten fins | Once per season or as needed |
| Full seasonal shutdown prep | End of season |
| Spring startup inspection | Start of season |
This schedule means you’ll rarely run into big problems. Prevention is always cheaper than fixing.
Window AC Mistakes That Waste All Your Efforts
People make mistakes that undo their maintenance efforts, however well intentioned.
Mistake #1 — Putting a Wet Filter Back In Always dry the filter completely before replacing it. Wet filters reduce airflow and foster mold.
Mistake #2 — Cleaning Coils with a High-Pressure Water Nozzle High pressure bends fins and damages delicate components. Always use gentle spray or foam cleaners.
Mistake #3 — Running the AC Without the Filter Even for a “quick test” after cleaning, don’t do it. Dust gets into the coils immediately, nullifying your efforts.
Mistake #4 — Ignoring Weird Smells or Sounds A rattling noise may simply be a loose screw. A burning smell may mean there’s a major electrical problem. Don’t ignore signals — investigate early.
Mistake #5 — Cleaning Only the Outside Shiny on the outside doesn’t matter if the coils and drain pan are filthy right underneath. Go deeper.
FAQs — Window AC Cleaning & Maintenance
Q: How often should I do a full window AC clean? At a minimum, clean thoroughly at the beginning and end of each cooling season. Clean the filter every 2–4 weeks during the season as needed.
Q: Can I use bleach on AC coils? Bleach is not good for coils — it can cause corrosion. Instead, use a purpose-made coil cleaner. Bleach should only be used in diluted form, and only for the drain pan.
Q: My air conditioner smells moldy — should I run it? A moldy AC unit blows spores into your rooms, which can negatively impact air quality and health. Clean the drain pan, filter and coils right before using it again.
Q: Why do I get water dripping inside from my window AC? Usually, this means the drain pan is clogged or the unit isn’t tilted slightly toward the back. Window AC units should be tilted back a fraction (roughly 1/2 inch), so water drains outside.
Q: Should I hire a pro for window AC maintenance? Most regular maintenance is DIY-friendly. But if you discover refrigerant leaks, electrical problems, or the unit isn’t cooling despite being clean, contact a certified technician.
Q: Is it safe to use a normal household cleaner on my AC? Use only mild dish soap, white vinegar or specially designed AC cleaners. Aggressive chemicals can ruin fins, coils and plastic parts.
Q: How can I tell if my AC needs replacing or just cleaning? If your unit is older than 10–12 years, makes persistent loud noises and doesn’t cool well even after a full maintenance service — replacement will probably be more cost-effective than repair.
Wrapping It All Up
Window AC cleaning and maintenance doesn’t require professional training or special tools. All it takes is consistency and knowing the right things to do.
The five hacks in this guide touch on the only things that matter:
- Deep filter cleaning — the simplest efficiency increase you can get
- Coil cleaning, inside and out — done the right way
- Drain pan maintenance — eliminate mold and odors at the source
- Fin straightening — a quick fix with real airflow advantages
- Seasonal shutdown prep — protecting your investment in the off-season
Follow these steps, maintain a regular schedule and your window AC will reward you with cooler air, lower energy bills and a longer life.
A little work now can prevent a lot of headaches — and spending lots of money — down the road. Start with the filter today, then build from there.
Stay cool.