Meta Description: Window AC cleaning & maintenance guide adjustments can slash your energy bill significantly. Discover 5 smart, easy tips to keep your unit running cool and efficient all season.
5 Smart Window AC Cleaning & Maintenance Guide Adjustments That Save Power
Summer hits hard. Your window AC unit is running for hours. And your electricity bill continues to soar. Sound familiar?
Here’s the thing — many people don’t know that a dirty or poorly maintained window AC can consume up to 25% more energy than one that is clean and well-tuned. All that money going to waste (pun intended).
The good news? You don’t have to be an HVAC technician to fix this. Making a few simple adjustments to your window AC cleaning and maintenance guide can streamline how well your unit runs.
In this guide, you’ll discover 5 practical, proven tweaks that use less power — reducing runtime, helping your room stay cooler, and prolonging your unit’s lifespan.
Let’s get into it.
Why Your Window AC Is Probably Just Wasting Energy Right Now
Before diving into the tips, you should know why a window AC unit loses efficiency over time.
Every window AC unit draws warm indoor air over a set of cooling coils. Refrigerant cools those coils. A fan then blows that cooled air back into your room.
Simple, right?
But this is where it falls apart. Dust, dirt, pet hair, and mold begin to accumulate on the filters, coils, and fins over weeks and months. When that occurs, the unit must exert more effort to force air through the clogs. Working harder means consuming more electricity.
It’s like trying to breathe through a clogged nose. You can, but it takes much more work.
Here’s an example of how much efficiency can drop when maintenance is ignored:
| Maintenance Issue | Estimated Energy Loss |
|---|---|
| Dirty air filter | 5–15% reduced efficiency |
| Clogged evaporator coils | 10–20% less efficient |
| Bent condenser fins | 5–10% less efficient |
| Faulty window seal | 10–15% wasted cooling |
| Incorrect thermostat setting | Up to 25% more usage |
Now let’s discuss what to do about each of these — one by one.
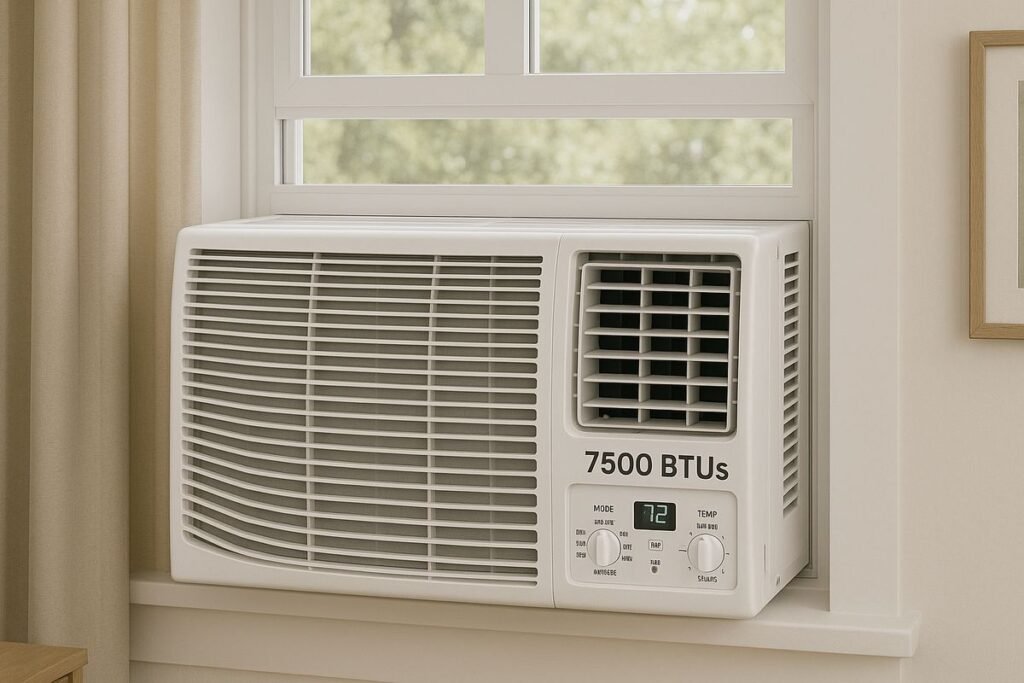
Adjustment #1 — Clean or Replace Your Air Filter Every 2–4 Weeks
This is the most powerful thing you can do. Period.
Your window AC air filter is the first line of defense against dust and debris entering the system. When it becomes obstructed, airflow slows down considerably. The unit has to operate longer to cool the same area.
How to Check Your Filter
Most window AC units feature a removable front panel. Snap it off and pull out the filter. Hold it up to a light source.
- If you can see through it to the light, it’s fine.
- If it appears gray, dense, or matted with dust — it is due for cleaning or replacement.
How to Wash a Reusable Filter
- Remove the filter from the unit.
- Take it outside or to a sink.
- Use lukewarm water and rinse it from the back side, pushing any debris out forward.
- For difficult buildup, use a soft brush and gentle dish soap.
- Rinse thoroughly. Let it air dry completely.
- Reinstall only when completely dry — damp filters are hosts to mold.
Pro tip: Avoid using a dryer or direct heat to dry things more quickly. It can warp the filter mesh.
When to Replace Instead of Clean
Replace the filter if it has rips, holes, or is permanently gray — even after washing. Replacement filters are typically cheap — often less than $10 — and available at hardware stores or online by your AC model number.
Bottom line: A clean filter can enhance efficiency by as much as 15%. It takes 10 minutes to clean. There is no good reason not to do it.
Adjustment #2 — Straighten the Condenser and Evaporator Fins
If you’re like most people, you’ve never heard of AC fins. But they matter a lot.
There are two sets of thin metal fins inside your window unit — one on the indoor side (evaporator fins) and one on the outdoor side (condenser fins). These fins increase the coils’ surface area, which aids heat exchange for the AC.
Over time, the delicate aluminum fins become bent. It occurs from normal use, from cleaning too vigorously, or merely from bumping the unit around during installation.
Bent fins reduce airflow. Less airflow means less heat transfer. Less heat transfer means your AC has to work longer to get the job done.
How to Spot Bent Fins
Look directly at the front or back of the unit at the fins. They should resemble a neat, tight comb — parallel lines all running in the same direction. If any are squashed, bent sideways, or crammed together, that’s your problem.
How to Straighten Fins Safely
You’ll need a fin comb — an inexpensive, basic tool found at most hardware stores for under $15. Fin combs have several settings to accommodate varying fin densities (fins per inch).
Steps:
- Unplug the AC unit completely.
- Match the fin spacing with the proper setting on your fin comb.
- Gently drag the comb slowly through the bent sections.
- Work slowly. These fins are thin and can bend easily in either direction.
- Don’t force it. A few light passes are better than one heavy one.
Important: Never use a butter knife, screwdriver, or any rigid flat tool. You’ll make it worse.
Straightening the fins has an immediate impact on airflow. Many homeowners report that their AC blows noticeably colder after doing this for the first time.
Adjustment #3 — Deep Clean the Evaporator and Condenser Coils
Filters catch a lot — but not everything. Fine dust passes through and settles directly on the coils. A thin layer of grime collects on those coils over the course of a season or two.
This layer acts like insulation. It prevents proper heat exchange. And it makes your system work harder.
Here’s an easy way to think about it: coils are designed to either absorb heat (evaporator side) or release it (condenser side). When they’re coated with dust, neither job gets done well.
For a deeper dive into seasonal upkeep best practices, the window AC maintenance experts at WindowACMaintenance.blog have a wealth of resources worth bookmarking.
What You’ll Need for Coil Cleaning
- A can of no-rinse AC coil cleaner (available at hardware stores)
- A soft-bristle brush
- A spray bottle with water
- Protective gloves and eye protection
- A dry cloth or towel
Step-by-Step Coil Cleaning Process
Step 1: Unplug the unit. Safety first — always.
Step 2: Carefully remove the outer casing. Most window AC units have screws along the sides or back. Check your manual if you’re unsure.
Step 3: Use the soft brush to loosen surface dust from the coils. Gently brush in the direction of the fins.
Step 4: Spray the no-rinse coil cleaner onto both sets of coils. It will foam up as it works — that’s normal. It breaks down grease and grime.
Step 5: Allow the foam to sit for 5–10 minutes. The cleaner is designed to drain away on its own during operation, so you don’t need to rinse it off.
Step 6: Reassemble the unit and run it for about 15 minutes. Condensation generated during operation will flush the residue out through the drain.
How Often Should You Clean the Coils?
| Usage Level | Recommended Cleaning Frequency |
|---|---|
| Light use (2–3 hrs/day) | Once per season |
| Moderate use (4–6 hrs/day) | Every 3–4 months |
| Heavy use (8+ hrs/day) | Every 6–8 weeks |
| Pet owners or dusty areas | Every 4–6 weeks |
Cleaning the coils is one of the most frequently neglected aspects of any window AC cleaning and maintenance guide. But it really matters — particularly in older units.
Adjustment #4 — Seal the Window Gap Around Your Unit
Here’s an efficiency killer that has nothing to do with the AC unit itself: air leaks around the window.
Once your window AC is mounted, there’s usually a gap between the unit, the accordion side panels, and the window frame. These gaps allow hot outdoor air to enter — and your freshly cooled indoor air to escape.
The result? Your AC works harder to compensate. You pay more. The room never feels quite as cool as it should.
Common Sources of Air Leakage
- Worn or missing foam insulation strips
- Accordion side panels that don’t close tightly
- Gaps between the unit and the window sill
- Old caulking that has dried and cracked
How to Find Leaks Quickly
On a hot day, place your hand around the edges of the installed unit. If you can feel warm air entering anywhere, that’s a leak. Another trick: hold a lit incense stick close to the edges. If the smoke wavers or gets pulled toward the gap, air is flowing through it.
How to Seal Those Gaps
For small gaps: Use foam weatherstripping tape. It’s self-adhesive, easy to trim to size, and costs just a few dollars. Press it firmly along the edges of the side panels and between the unit and the window frame.
For larger gaps: Use a removable rope caulk. It looks like a thick putty. You push it into the gap with your fingers. At the end of the season, you peel it off cleanly without damaging anything.
For accordion side panels: If they’re warped or cracked, you can replace them cheaply. Check your AC manufacturer’s website or a hardware store for compatible panels.
The Payoff of a Good Seal
| Sealing Quality | Estimated Cooling Efficiency |
|---|---|
| No sealing (bare gaps) | 60–70% |
| Basic foam strips | 80–85% |
| Full seal with caulk | 90–95% |
A good seal can cut your AC’s cooling load by a significant amount — often enough to lower your thermostat setting by 2–3 degrees while feeling just as comfortable.
Adjustment #5 — Fine-Tune Your Thermostat and Fan Settings
This final adjustment is purely behavioral — but don’t underestimate it. How you operate your window AC is just as important as how clean it is.
A lot of people keep their AC set as cold as it goes, assuming it cools the room quicker. It doesn’t. A window AC cools at roughly the same rate regardless of the temperature you set it to. The setting only determines when it stops — not how quickly it works.
Set too low, it runs longer than necessary. That wastes electricity.
The Golden Temperature Range
According to the U.S. Department of Energy, setting your thermostat to around 78°F (26°C) when you’re home is one of the most effective ways to reduce cooling costs. Energy experts broadly advise staying within the 72°F to 78°F (22°C to 26°C) range for the best balance of comfort and efficiency.
For every degree you raise the setting, about 3–5% is saved on your cooling costs. It adds up fast over a summer.
Fan Speed Settings Explained
Most window ACs are equipped with 2–3 fan speed settings. Here’s how to use them wisely:
| Fan Setting | Best Used When |
|---|---|
| Low | Room is close to target temp; just maintain it |
| Medium | Everyday use for steady cooling |
| High | Room is hot and needs to cool down quickly |
Pro tip: Once the room is cool, switch to Low or Medium. The room stays comfortable, and the unit consumes less energy.
Use the Sleep or Energy-Saver Mode
Most newer window ACs have an Energy Saver or Auto mode. In this mode, the fan turns off when the compressor stops running. This alone can reduce energy usage by 30–40% compared to always running the fan continuously.
Use it — especially overnight — if your unit has this setting.
The Thermostat + Maintenance Combo Effect
| Scenario | Estimated Monthly Energy Use |
|---|---|
| Dirty filter + low thermostat setting | Very High (~$90–$110/month) |
| Clean filter + medium setting | Moderate (~$60–$75/month) |
| All 5 adjustments applied | Low (~$40–$55/month) |
Note: Estimates are based on an average of 8 hours of daily use for a 10,000 BTU unit running in moderate climates.
The combination of smart settings and proper cleaning has a compounding effect. Each adjustment builds on the ones before it.
A Simple Monthly Maintenance Checklist
To help keep track of all this, here’s a handy checklist you can follow during the cooling season:
Every 2–4 Weeks:
- [ ] Inspect or clean the air filter
- [ ] Check window seals for new gaps or wear
Every 1–2 Months:
- [ ] Brush dust off visible coil surfaces
- [ ] Check fin alignment and straighten if needed
- [ ] Verify thermostat and fan settings
Once Per Season:
- [ ] Deep clean coils with no-rinse cleaner
- [ ] Inspect accordion panels and replace if cracked
- [ ] Remove and store the unit properly if applicable
What Happens If You Ignore Maintenance Altogether?
Let’s be real — most people haven’t serviced their window AC until something goes wrong. But here’s what that neglect costs over time:
Short-term (1 season): Higher electricity bills. Weaker cooling. More humidity indoors.
Medium-term (2–3 seasons): Mold growth inside the unit. Musty smell from the vents. Reduced airflow even on high settings.
Long-term (3+ seasons): Compressor strain. Potential refrigerant issues. Full unit failure — meaning a $200–$600 replacement cost.
A simple window AC cleaning and maintenance guide routine will cost you under $20 in supplies and a few hours each season. Compared to replacing the unit early, that’s a clear win.
FAQs About Window AC Cleaning & Maintenance
Q: How often should I clean my window AC overall? A: Clean it thoroughly at the beginning of each cooling season, and check the filter every 2–4 weeks during use. If you have pets or live in a dusty area, clean more often.
Q: Can I clean my window AC without removing it from the window? A: Yes — you don’t have to remove the unit for basic filter cleaning and light coil dusting. You might have to remove the outer casing for a deep coil clean, but the unit can stay in the window.
Q: Is it safe to use a vacuum on AC coils? A: You can use a vacuum with a soft brush attachment to remove loose dust. But don’t press too hard against the fins — they bend easily. Follow up with a coil cleaner spray for best results.
Q: What’s the best temperature to set my window AC for saving electricity? A: The sweet spot is 74–76°F (23–24°C). This keeps most people comfortable without unnecessarily long runtimes. Run a ceiling fan alongside your AC to feel cooler at higher temperature settings.
Q: Why does my window AC smell musty even after cleaning? A: Musty smells typically indicate mold or mildew growing on the evaporator coils or drain pan. Clean the drain pan with a diluted bleach solution (1 part bleach to 10 parts water). If the smell remains, the evaporator coil may need a more thorough antifungal treatment.
Q: Do window AC units need professional servicing? A: The DIY steps in this guide will be sufficient for most homeowners. You’d only need a professional if you suspect a refrigerant leak (the unit doesn’t cool even when clean), or if electrical components fail.
Q: Can I use a pressure washer to clean my AC coils? A: No. High-pressure water will bend the fins and potentially damage electrical components. Use a gentle rinse or no-rinse coil cleaner spray only.
Wrapping It Up — Small Effort, Big Savings
Maintaining your window AC’s efficiency doesn’t require special skills or expensive tools. It just requires consistency.
The 5 adjustments in this window AC cleaning and maintenance guide — cleaning the filter, straightening the fins, deep cleaning the coils, sealing air gaps, and optimizing your settings — work together to reduce your unit’s workload. And a unit that works less consumes less power.
Over a single cooling season, these changes can realistically save you $30–$60 or more on your electricity bill. Over several years, they can extend your unit’s life by two to three seasons — saving you hundreds in replacement costs.
Start with the filter today. It takes 10 minutes. From there, work through the rest of the checklist at your own pace.
Your wallet — and your AC unit — will appreciate it.