Meta Description: Window AC cleaning & maintenance guide to keep your unit running efficiently all season long — save energy, reduce repairs, and extend its lifespan with these 10 expert tips.
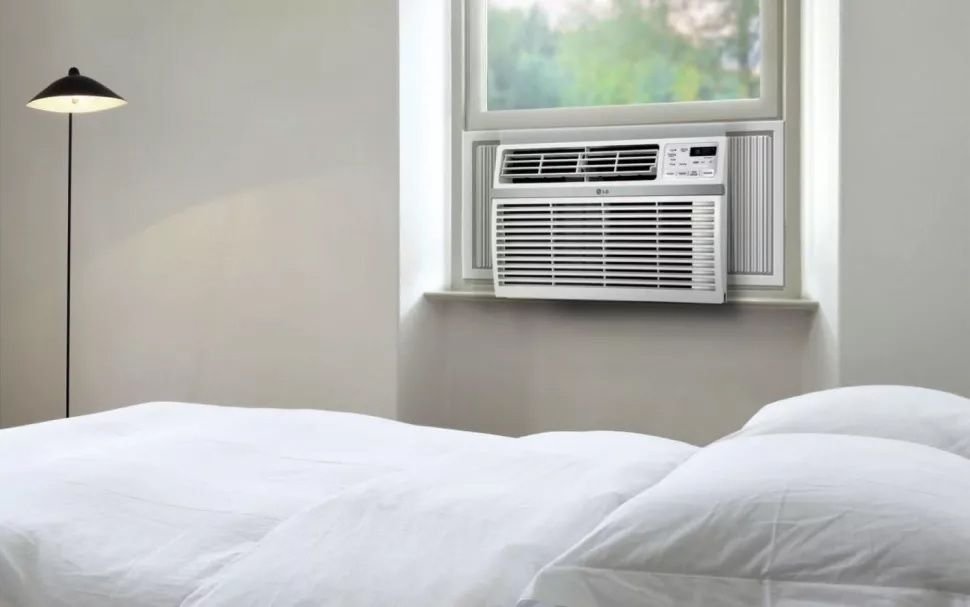
10 Ultimate Tips for Window AC Cleaning & Maintenance Guide (Lasting Cool)
Is your window AC blowing hot air, making strange sounds, or cranking up your electricity bill? You’re not alone. Most people forget about their AC units until something breaks — and at that point, it’s too late.
The good news? A little regular maintenance goes a long way. This window AC cleaning & maintenance guide will provide you with 10 simple, yet useful steps to make sure your unit is cooling like a champion for years to come.
No special skills needed. No expensive service calls. These are just smart habits that help you save time, money, and sweat.
Let’s dive in.
The Importance of Window AC Maintenance
Treat your window AC like a car. Don’t change the oil, and the engine burns out. Avoiding AC maintenance? Same deal — only now with even more humidity and regret.
This is what bad upkeep looks like:
- Higher energy bills (a dirty AC can consume 15–25% more power)
- Weak or warm airflow
- Mold and bacteria growing inside the unit
- Shorter lifespan (a neglected unit can last only 5–7 years rather than the usual 10–15)
- Expensive repairs or full replacement
A well-maintained window AC works efficiently, cools your room faster, and keeps the air inside healthier — unlike a neglected one that runs poorly and fills the air with dust.
What You’ll Need to Start
Gather these basic supplies before diving into the tips:
| Tool / Supply | Purpose |
|---|---|
| Screwdriver | Remove the front panel and casing |
| Soft brush or old toothbrush | Gently clean fins and coils |
| Vacuum with brush attachment | Extract dust and debris |
| Fin comb | Straighten bent AC fins |
| Mild dish soap | Wash the filter and casing |
| Spray bottle with water | Rinse and spot-clean components |
| Coil cleaner spray (optional) | Deep cleaning of evaporator coils |
| Dry cloth or microfiber towel | Wipe down surfaces |
| Gloves and a mask | Personal protection during cleaning |
All of these items are cheap. Most of them are already in your home.
Tip #1 — Clean or Replace the Air Filter Every 2–4 Weeks
The air filter is the first line of defense. It catches dust, pet hair, pollen, and other particles before they enter the unit.
A clogged filter blocks airflow. That makes your AC work harder, consuming more energy and cooling less efficiently.
How to clean it:
- Switch off and unplug the AC unit.
- Remove the front panel (usually snaps or screws off).
- Slide out the filter.
- Shake it over a trash can and give it a light tap to remove loose dust.
- Rinse it under warm water with a drop of dish soap.
- Rinse well and allow to air-dry completely — never reinsert a damp filter.
- Reinstall once fully dry.
If the filter appears torn, stained beyond cleaning, or has holes — replace it. Replacement filters are inexpensive and readily available.
Pro Tip: Mark your calendar or set a phone reminder to clean your filter every 2–4 weeks during heavy use months.
Tip #2 — Clean the Evaporator and Condenser Coils
The cooling takes place at the coils. Evaporator coils (located inside the unit) absorb heat from your room. The condenser coils (on the back, facing outside) release that heat outdoors.
When dust and dirt accumulate on these coils, heat transfer slows down. Your AC cools less, works longer, and ages more quickly.
How to clean them:
- Using a soft brush, gently remove dust from the coil fins.
- For a deeper clean, spray a coil cleaner (found at hardware stores) on the coils.
- Leave the cleaner to foam and break down the grime.
- Wipe away residue with a damp cloth.
Be gentle. Coil fins are fragile and easily bent.
How Often Should You Clean the Coils?
| Situation | Recommended Frequency |
|---|---|
| Light use / clean environment | Once per season |
| Moderate use / average dust | Every 1–2 months |
| Heavy use / pets / dusty area | Every 3–4 weeks |
Tip #3 — Use a Fin Comb to Straighten Bent Fins
Inspect your AC coils closely. See those thin metal strips lined up like a comb? Those are fins.
Bent fins are more common than most people realize. They can get damaged during installation, cleaning, or simply from regular use. When the fins are bent, airflow through the coils is restricted — and your AC has to work harder.
A fin comb is a cheap, simple tool that slides between the fins and straightens them out. You can pick one up at any hardware store for just a few dollars.
Pass the comb gently through the fins in a straight line. Don’t force it. Take your time, especially in the most heavily bent areas.
This simple fix can make a big difference in the airflow and efficiency of your AC.
Tip #4 — Clear Out the Drain Pan and Drainage Hole
Your window AC removes moisture from the air while it cools. That moisture collects in a drain pan at the bottom of the unit.
When the drain pan clogs with dust, mold, or algae, water overflows into your room or back into the unit. That leads to water damage, mold growth, and electrical problems.
To clean the drain pan:
- Remove the front panel and filter.
- Find the drain pan at the base of the unit.
- Use a sponge or cloth to scoop out any standing water.
- Scrub the pan with a mild soap solution.
- Locate the drainage hole (typically on the bottom or back of the unit) and clear any blockage with a thin wire or pipe cleaner.
- Add a small amount of diluted bleach (1 tablespoon per gallon of water) to the pan to prevent mold growth.
Do this at the beginning of each cooling season and every month or two during periods of heavy use.
Tip #5 — Deep Clean the Exterior Casing
The outside of your AC gets beat up — rain, bird droppings, dust, and sunlight all wear it down. A filthy casing isn’t just unsightly; it can trap heat against the unit and hinder performance.
Cleaning the casing:
- Mix warm water with a few drops of dish soap.
- Dip a cloth or sponge into the solution and wipe down the exterior.
- Scrub vents and corners where dust hides with an old toothbrush.
- Wipe with a damp cloth and dry with a towel.
Avoid using harsh chemical cleaners, bleach (on the casing), or spraying water directly into vents and openings.
What to Avoid When Cleaning the Casing
| Don’t Do This | Why It’s a Problem |
|---|---|
| Use abrasive scrubbers | Scratches and damages the surface |
| Spray water into electrical openings | Short circuit risk |
| Use bleach or strong chemicals | Discolors and weakens plastic over time |
| Clean while plugged in | Severe safety hazard |
Tip #6 — Check and Seal the Window Installation
An improperly sealed window AC unit wastes a massive amount of energy. Warm outside air seeps around the edges, making your AC work harder.
Walk around the unit and feel for drafts. If you can feel warm air coming in, you’ve got an air leak.
How to seal it properly:
- Apply foam weatherstripping tape along the edges where the unit meets the window frame.
- Fill larger gaps with foam backer rod or insulating foam sealant.
- Check the accordion side panels — these can stretch over time and create gaps.
- Replace cracked or worn accordion panels if needed.
Sealing air leaks takes less than an hour and can noticeably lower your cooling bills. For more seasonal tips and step-by-step maintenance walkthroughs, check out Window AC Maintenance — a dedicated resource for keeping your unit in peak condition year-round.
Tip #7 — Keep the Area Around the Outdoor Section Clear
The back of your window AC (the part sticking outside) needs clear, open space to operate properly. It exhausts heat outdoors. When that airflow is blocked, the heat has nowhere to escape and the unit overheats.
What to check:
- Make sure no plants, vines, or debris are growing against the unit.
- Keep at least 12–18 inches of clearance on all sides.
- Remove any bird nests, leaves, or dirt stuck to the exterior grill.
- Clean the exterior grill with a soft brush or low-pressure rinse.
Also, don’t cover the back of the unit with anything — no curtains, no furniture, nothing that blocks airflow.
Tip #8 — Test the Thermostat and Controls Regularly
Your AC’s thermostat controls everything — when it turns on, how cold it gets, and when it cycles off. If it’s not accurately reading temperatures, your unit runs when it shouldn’t and shuts off when it should keep cooling.
Simple tests to run:
- Set the thermostat to a specific temperature and check whether the AC actually reaches and holds that temp.
- Use a separate room thermometer to compare — if there’s a large difference, the thermostat may need recalibration or replacement.
- Test all modes: cool, fan, and auto. Make sure each one responds correctly.
- Check all buttons and the remote (if applicable) to ensure they register inputs without sticking or lagging.
If you notice inconsistencies, consult the user manual or contact the manufacturer for thermostat recalibration steps.
Tip #9 — Inspect the Power Cord and Electrical Connections
Electrical issues with window AC units are more common than you might expect — and they can be dangerous. A frayed power cord or loose connection can cause a fire.
What to look for:
- Cracks, fraying, or melted spots on the power cord
- Burn marks or discoloration near the plug or outlet
- A loose fit when plugging in the unit
- The unit tripping circuit breakers repeatedly
If you notice any of these, stop using the unit immediately and have it inspected by a licensed electrician or HVAC technician.
According to the U.S. Consumer Product Safety Commission, faulty air conditioner wiring and electrical failures are among the leading causes of home fires during summer months — so never take electrical warning signs lightly.
Never use an extension cord with a window AC unit. These units draw a lot of power, and most extension cords are not rated for that load — creating a serious fire hazard.
Safety Rule: Always plug your window AC directly into a dedicated wall outlet that meets the unit’s power requirements.
Tip #10 — Store the Unit Properly During the Off-Season
How you treat your AC unit in winter directly impacts its performance next summer. Improper storage leads to dust buildup, pest infestations, rusted components, and mold growing inside the unit.
Proper off-season storage steps:
- Thoroughly clean the unit (filter, coils, drain pan, and casing) before putting it away.
- Allow all parts to dry completely to prevent mold.
- Remove the unit from the window if possible — this prevents cold drafts and protects the unit.
- Cover it with a breathable AC cover (not plastic — that traps moisture).
- Store in a cool, dry place such as a closet or basement — not a humid garage.
- Place a few moisture-absorbing packets (silica gel) near the unit to prevent moisture buildup.
If you can’t remove the unit from the window, at the very least use an insulated exterior AC cover to shield it against snow, ice, and cold drafts.
Window AC Maintenance Schedule at a Glance
Here’s a straightforward chart to keep you on track all year:
| Task | Frequency |
|---|---|
| Clean/replace air filter | Every 2–4 weeks (during use) |
| Wipe coils | Monthly during use |
| Check drain pan | Monthly during use |
| Clean exterior casing | Monthly |
| Check window seals | Start of each season |
| Inspect electrical cord | Start of each season |
| Clear outdoor section | Monthly during use |
| Test thermostat | Every 1–2 months |
| Straighten fins | Once per season |
| Full deep clean + storage prep | End of cooling season |
Pin this somewhere visible. A regular routine is the best long-term investment you can make in your AC unit.
How to Know When Your Window AC Needs a Professional
Even with the best maintenance, there are times when you need a pro. Watch out for these red flags:
- Warm air despite correct settings — Could be a refrigerant leak.
- Ice forming on the unit — Indicates restricted airflow or low refrigerant.
- Loud banging or grinding noises — May signal a broken fan or compressor issue.
- Strong burning smell — Electrical problem. Unplug immediately.
- Water leaking inside your room excessively — Blocked drain or tilted installation.
- Unit won’t turn on at all — Could be electrical, thermostat, or compressor failure.
These problems go beyond basic DIY maintenance. An HVAC technician can diagnose and fix them safely.
Fast Energy-Saving Habits to Adopt Alongside Your Maintenance Routine
Cleaning your AC is just half the battle. Pair your maintenance with these habits for maximum efficiency:
- Set the thermostat to 78°F (25°C) — The sweet spot between comfort and energy savings.
- Use ceiling fans alongside your AC — Circulating air from fans means the AC doesn’t have to work as hard.
- Close blinds or curtains during peak sunlight hours — Less heat coming in equals less work for the AC.
- Keep heat-generating appliances away from the thermostat — Lamps, ovens, and TVs can fool it into thinking the room is hotter than it really is.
- Don’t cool rooms you aren’t using — Close doors to unused spaces.
FAQs — Window AC Cleaning & Maintenance Guide
Q1: How often should I clean my window AC unit overall? Perform a light clean (filter and casing) every 2–4 weeks while in use. Perform a complete deep clean at the beginning and end of each cooling season.
Q2: Can I use a hose to wash my window AC unit? You can gently rinse the coils and drain pan, but never spray water directly into electrical components, the fan motor, or the control panel. Use a low-pressure spray and keep water away from openings.
Q3: What happens if I don’t clean the filter regularly? A clogged filter restricts airflow, forces the unit to work harder, raises energy use by as much as 25%, and may cause coil icing and early motor burnout.
Q4: How can I tell if there’s mold inside my window AC? Signs include a musty smell when the AC is running, visible dark spots on the filter or casing, and allergy-like symptoms (sneezing, coughing) when indoors. If mold is inside the coils or fan, a professional cleaning is recommended.
Q5: Should I clean the AC myself, or do I need to call someone? Basic cleaning (filter, casing, drain pan, fins) is perfectly safe to do yourself — as long as you unplug the unit first. For electrical problems, refrigerant issues, or internal mechanical repairs — always call a licensed technician.
Q6: Will cleaning my AC actually reduce electricity bills? Yes, noticeably. According to the U.S. Department of Energy, a clean filter alone can reduce energy consumption by 5–15%. Add coil and drain pan maintenance, and the savings grow even further.
Q7: What is the best time to do a full AC maintenance check? Twice a year — once at the start of cooling season (spring) and once at the end (fall before storage). This guarantees the unit is ready to perform when you need it most.
Wrapping It All Up
Maintaining your window AC doesn’t require a great deal of time or money — but it makes an enormous difference. A clean, well-maintained unit runs more efficiently, lasts longer, uses less energy, and keeps the air in your home healthier.
This window AC cleaning & maintenance guide equips you with everything necessary to manage your home comfort. Start with the basics — clean that filter today — and build from there.
Small habits now can save big headaches (and bills) later. Your AC works hard for you all summer long. A little care is the least you can give back.
Stay cool. 🌬️